
Set up your business profile and logo
Keep company details and branding together.
The numbers in these website screenshots identify controls and statuses, not a required click sequence. Example records and amounts are illustrative; mobile layouts may differ.
Where to find it
Open Business profile in the main navigation. This area is restricted to workspace owners and admins; it is not the ordinary personal account profile.
Complete the details
-
Select the correct workspace.
-
Review the saved business and contact information.
-
Enter the missing required details and choose the actual customer source.
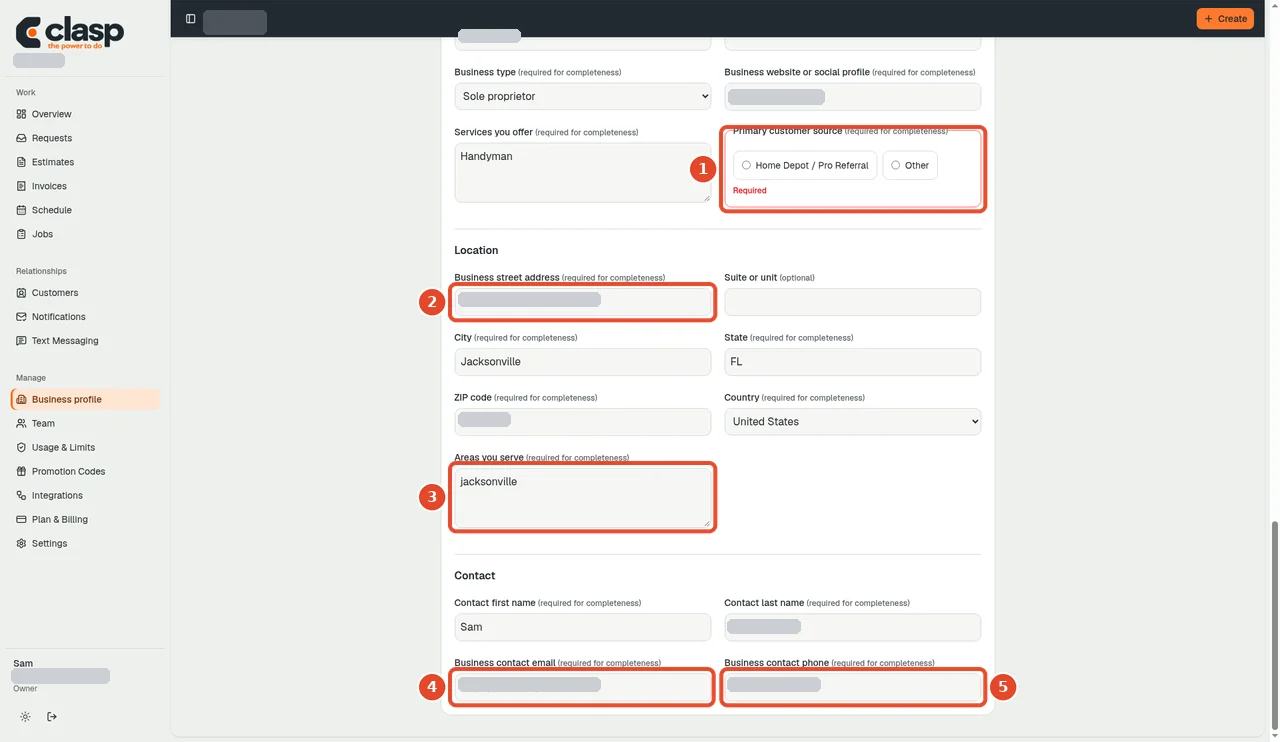
Fill in the required location and contact details and choose the source most of your customers actually come from. Numbered controls in this screenshot
- 1 — Primary customer source: Choose the source your business actually uses; do not select a provider just to fill the field.
- 2 — Business street address: Enter the business address, including any suite.
- 3 — Areas you serve: Describe the locations your business serves.
- 4 — Business contact email: Enter the business contact email.
- 5 — Business contact phone: Enter the business contact phone and save the profile after reviewing the required fields.
-
Save the profile and review the result.
The completeness percentage describes entered profile fields. It does not mean that a public website is published or texting is approved.
Add your logo
Use the business-logo section and its upload action. The recorded implementation accepts PNG or JPG with a 3 MB file limit; follow the live field guidance if it differs. Use a logo your business has permission to publish.
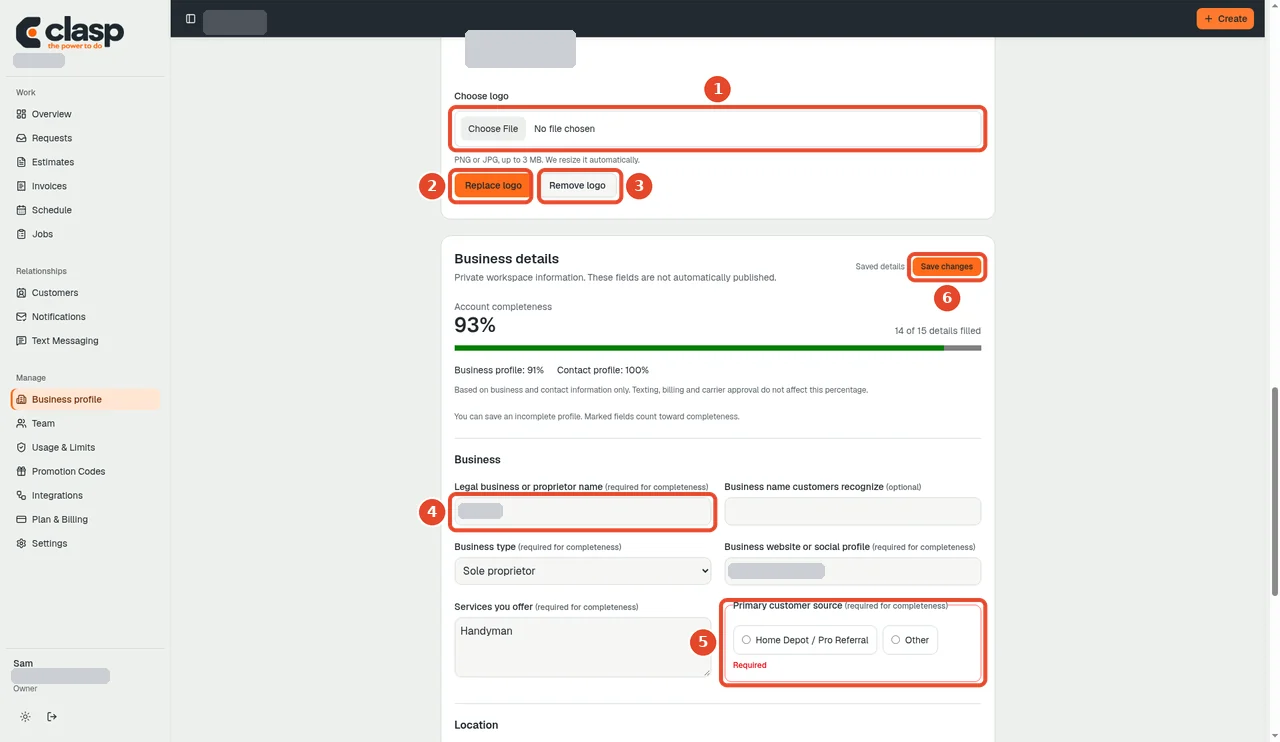
Numbered controls in this screenshot
- 1 — Choose logo file: Select a permitted PNG or JPG file using the displayed size limit.
- 2 — Replace logo: Upload the selected replacement when changing an existing logo.
- 3 — Remove logo: Use only if you intend to remove the current logo; this is not an upload step.
- 4 — Legal business name: Confirm the legal business name is accurate.
- 5 — Primary customer source: Confirm the customer-source selection.
- 6 — Save changes: Save changes to the profile and check the returned result.
Logo storage and its appearance on estimates, invoices, and the public site will be checked together during workflow testing. Do not use a customer's logo or assume every previously issued document changes retrospectively.
Public information is separate
Review the public website editor before publishing. Private profile/contact details should not be assumed to be public website content.