
Understand Thumbtack, Angi, and Zapier lead connections
Know the scope of each lead connection before enabling it.
The numbers in these website screenshots identify controls and statuses, not a required click sequence. Example records and amounts are illustrative; mobile layouts may differ.
Thumbtack for Pros
The documented implementation receives new leads through a provider webhook and a workspace-specific business binding. It is not a claim of a published partner OAuth application or complete synchronization of messages and reviews.
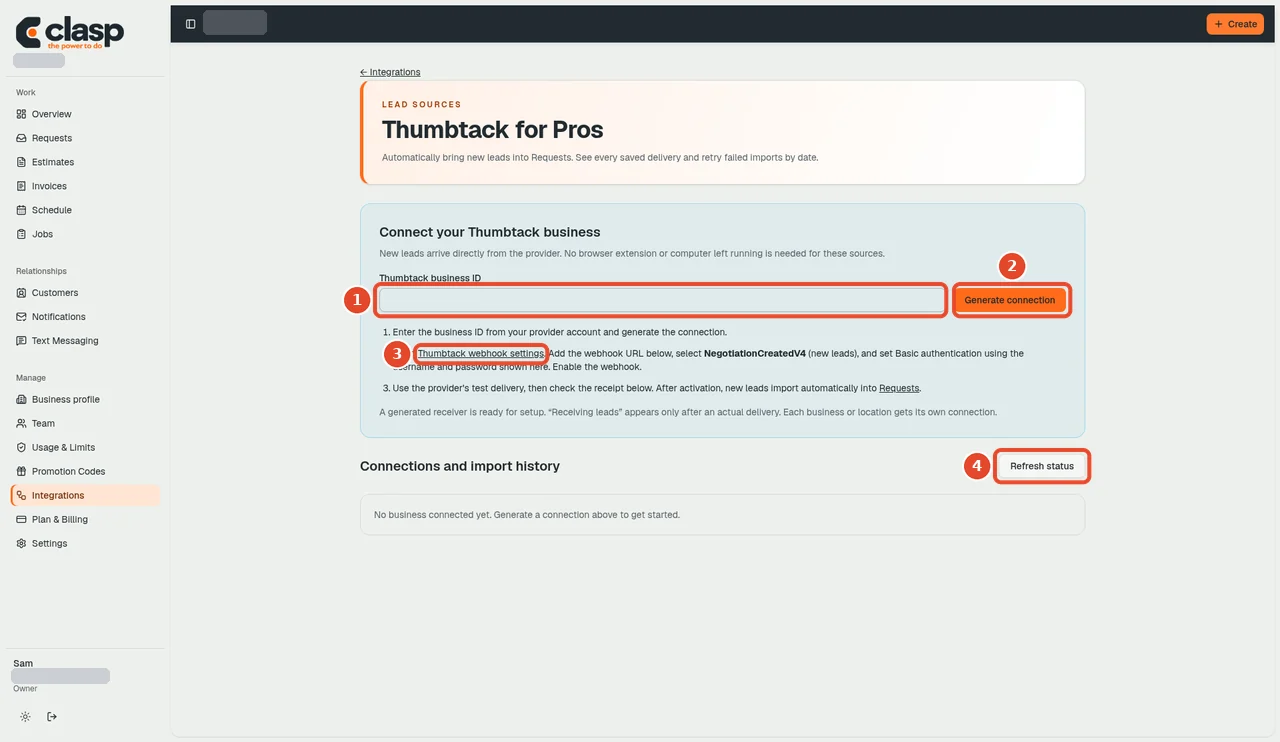
Numbered controls in this screenshot
- 1 — Thumbtack business ID: Use the business identifier for the correct provider account.
- 2 — Generate connection: Create the workspace's connection information when ready.
- 3 — Thumbtack webhook settings: Follow the provider-side webhook instructions; keep connection secrets private.
- 4 — Refresh status: Read the latest connection status, then separately check that a real lead reached Requests.
Angi
The documented implementation receives lead posts after the appropriate custom CRM setup. Creating a connection in Clasp does not prove Angi has enabled delivery.
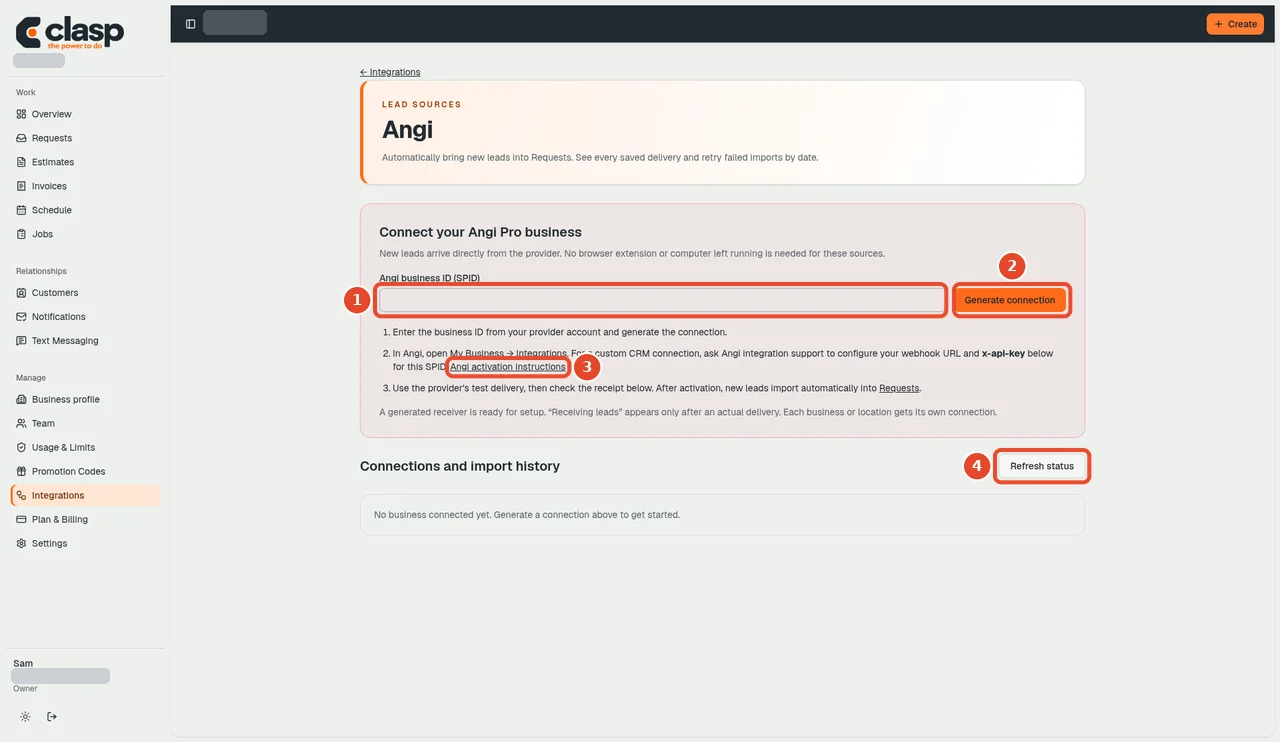
Numbered controls in this screenshot
- 1 — Angi business ID (SPID): Enter the correct Angi service-provider business identifier.
- 2 — Generate connection: Create the connection information for this workspace.
- 3 — Angi activation instructions: Complete the stated provider activation process.
- 4 — Refresh status: Refresh after setup and distinguish connection status from actual lead delivery.
Zapier
The Catch Hook shown here forwards captured Home Depot leads outward. It is separate from the newer Clasp app for Zapier and must not be described as all-source synchronization.
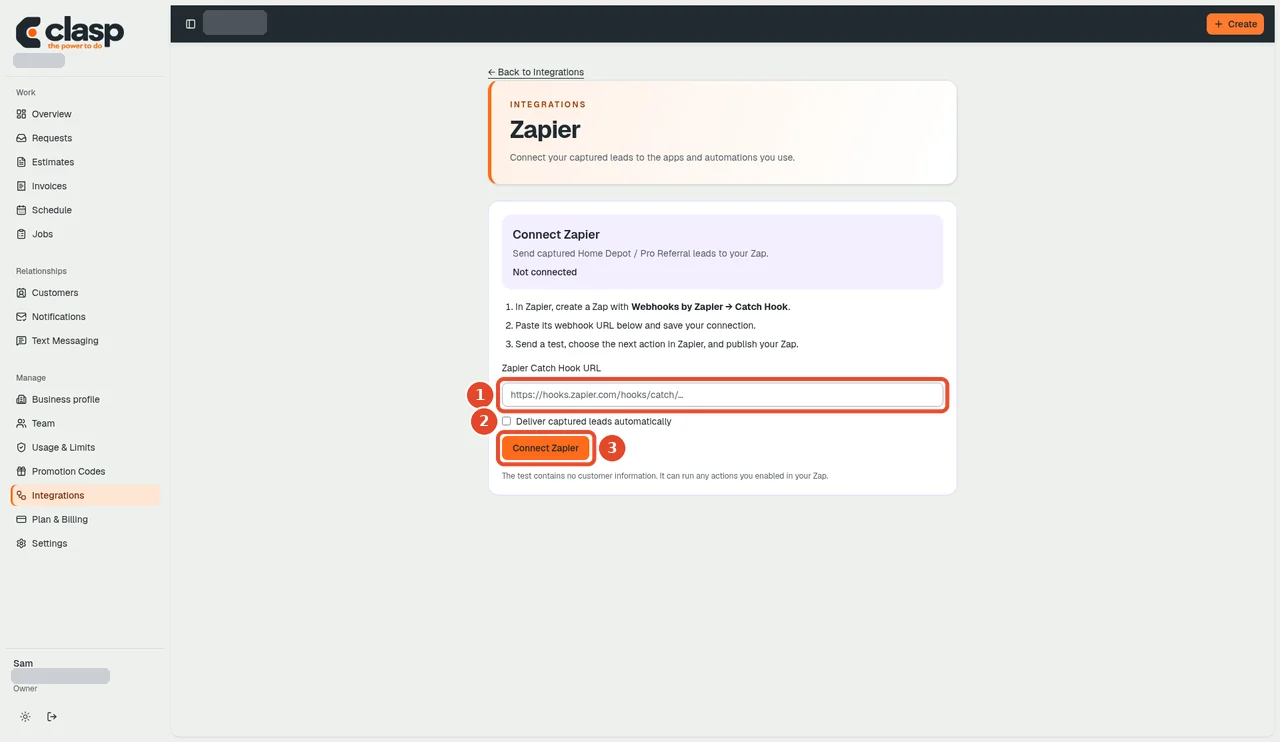
Numbered controls in this screenshot
- 1 — Zapier Catch Hook URL: Enter the hook from your intended Zapier workflow; keep it private.
- 2 — Deliver captured leads automatically (checkbox): Choose whether automatic outward lead delivery should be enabled.
- 3 — Connect Zapier: Save only after checking the destination and intended data flow.
For the authorized Clasp app in Zapier and the current CompanyCam connection, see Connect Zapier or CompanyCam.
Before turning anything on
Use the correct provider account and business ID, and keep generated connection credentials private. Follow the current provider instructions with Clasp support if activation requires coordination.
Provider activation, test receipt, natural lead delivery, duplicates, and recovery are later acceptance checks. These integrations are inventoried here, not newly activated or certified by this documentation task.