
Manage customers and service locations
Keep contact information, addresses, and history connected.
The numbers in these website screenshots identify controls and statuses, not a required click sequence. Example records and amounts are illustrative; mobile layouts may differ.
Find a customer
Open Customers and select the record you need. Clasp's source includes contact information, billing/service addresses, access notes, and linked work history.
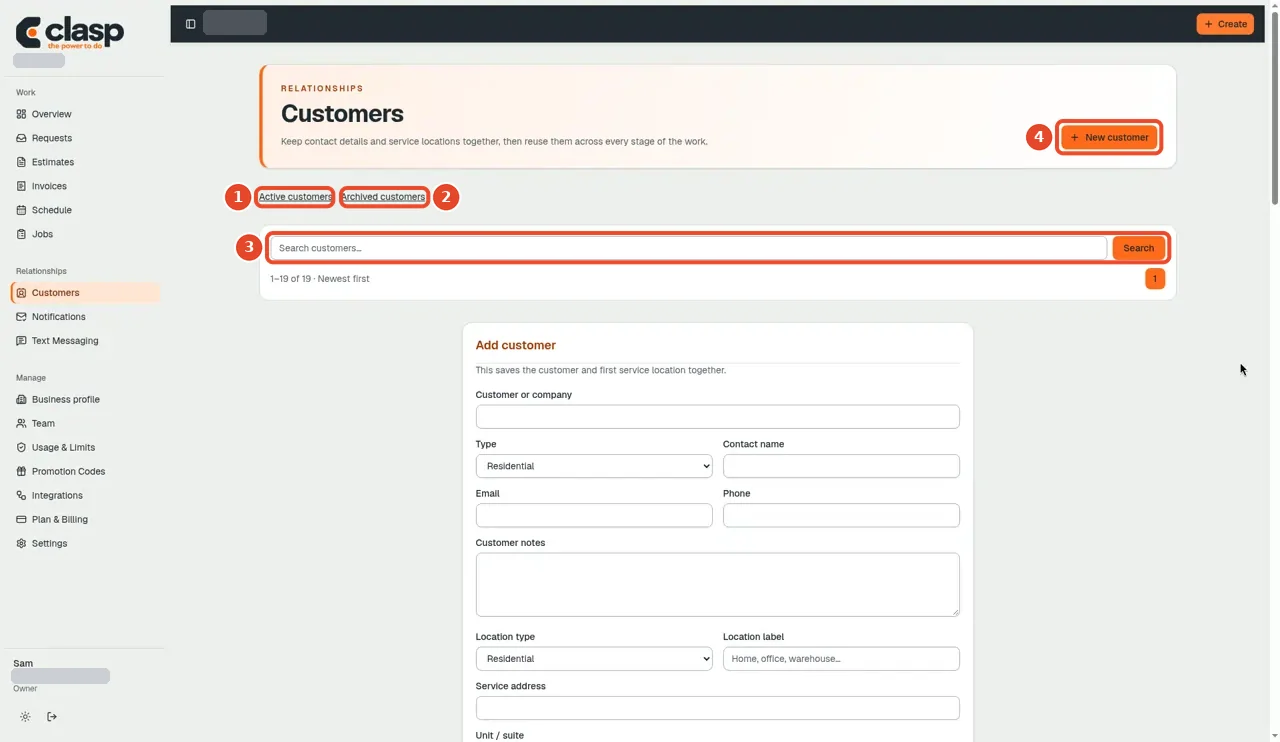
Numbered controls in this screenshot
- 1 — Active customers: View current customer records.
- 2 — Archived customers: Look here for archived records before creating a duplicate.
- 3 — Search customers: Search using the information you have.
- 4 — New customer: Open the new-customer form when no matching record exists.
Add a customer
From Customers, check for an existing record, then choose New customer. Complete the contact and service-location fields, review them, and save using the form's action.
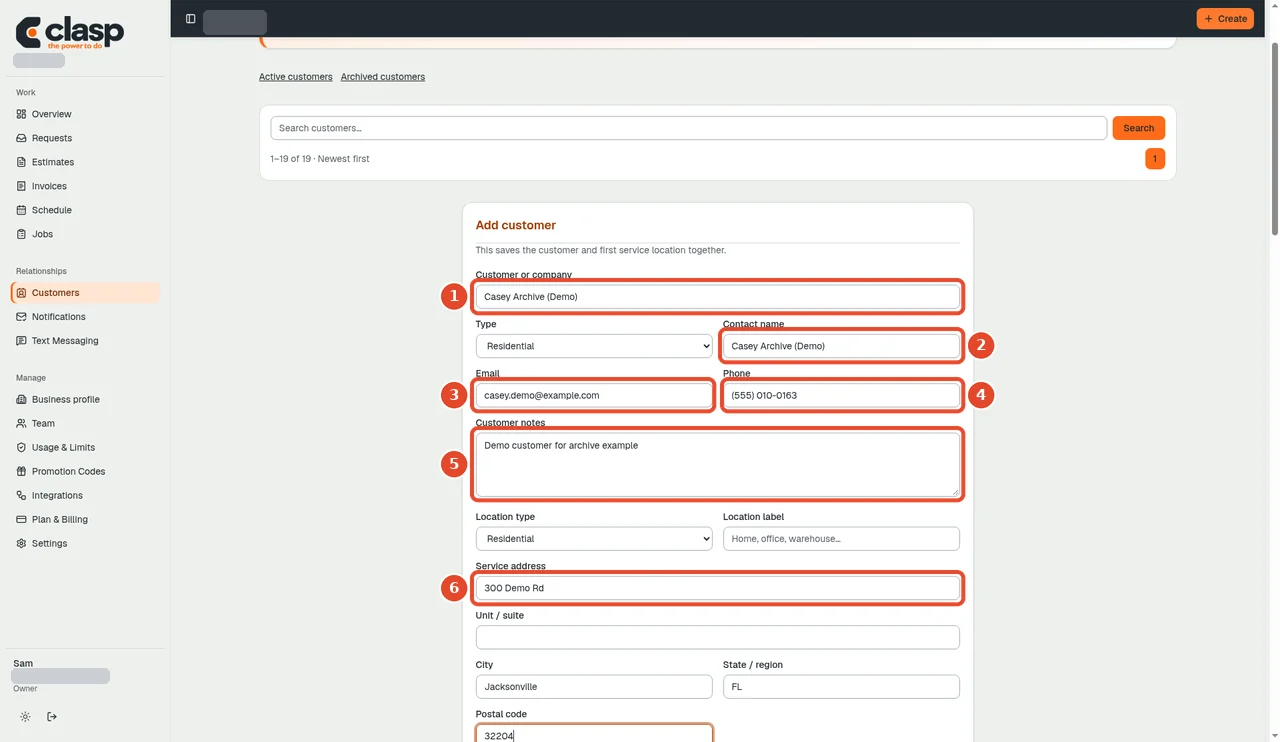
Numbered controls in this screenshot
- 1 — Customer or company: Enter the customer or company name.
- 2 — Contact name: Enter the relevant contact person's name.
- 3 — Email: Enter a verified contact email when available.
- 4 — Phone: Enter the correct contact phone.
- 5 — Customer notes: Add appropriate internal notes.
- 6 — Service address: Enter the actual service location, review the form, and use its save action.
To add many customers without creating service requests or contacting anyone, use the separate customer CSV import.
Review the right information
-
Confirm the person and workspace before editing.
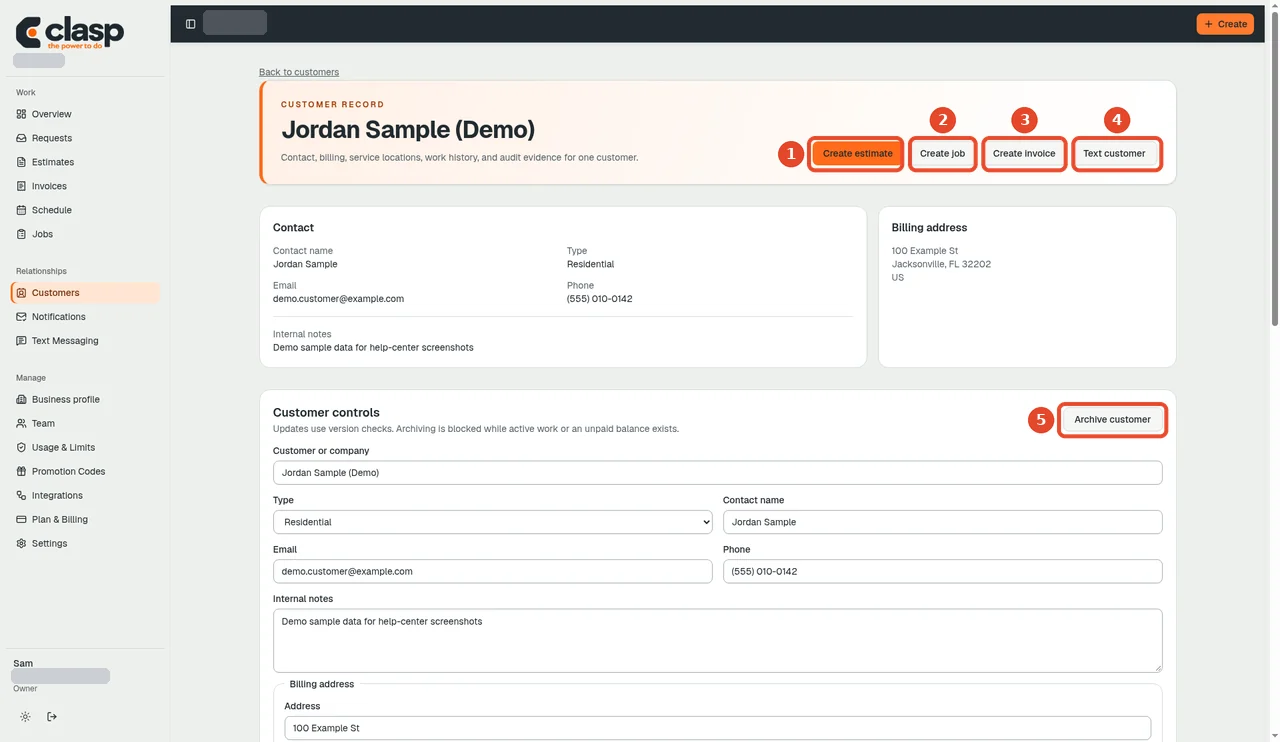
The customer record header confirms whose record you are in and links to the main actions. Numbered controls in this screenshot
- 1 — Create estimate: Begin an estimate for this customer.
- 2 — Create job: Begin a job for this customer.
- 3 — Create invoice: Begin an invoice for the intended work.
- 4 — Text customer: Open texting only when service readiness and customer permission requirements are met.
- 5 — Archive customer: Archive only when you intend to move this customer out of the active list. These actions are alternatives.
-
Distinguish the billing address from the service location.
-
Check related requests, jobs, and documents.
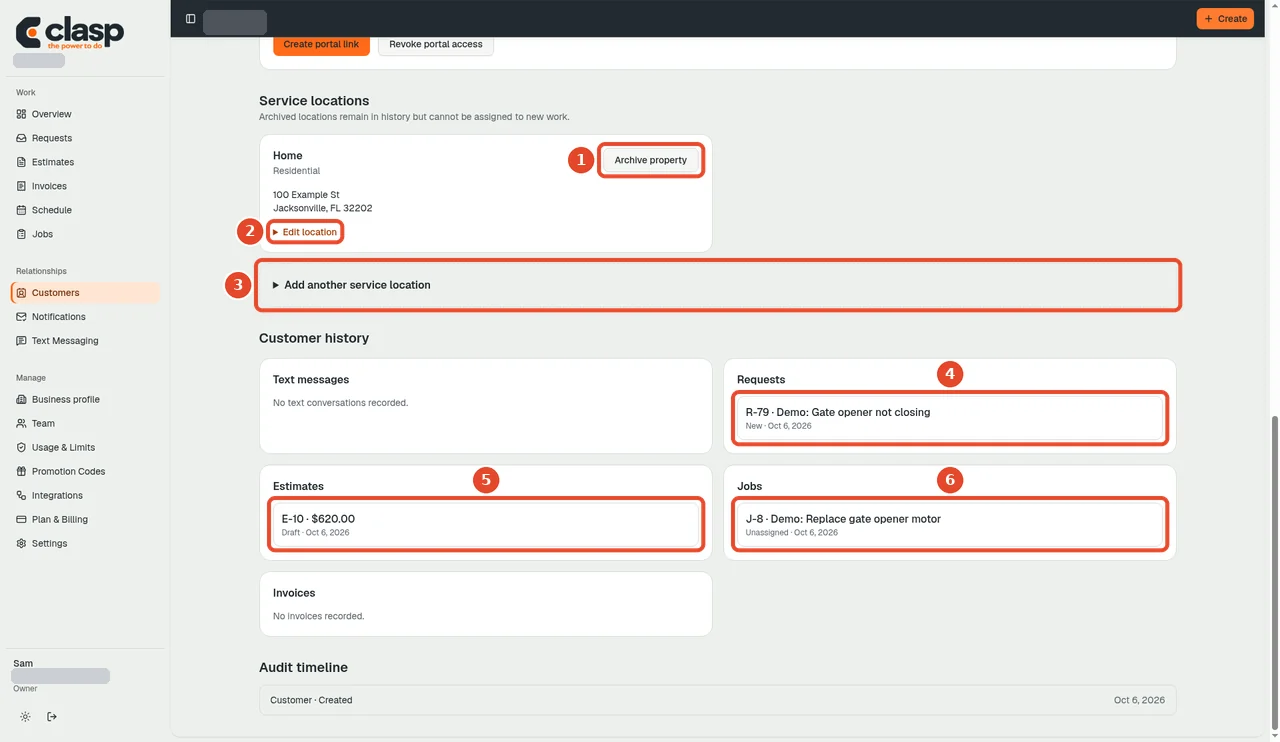
Service locations and linked work history appear further down the customer record. Numbered controls in this screenshot
- 1 — Archive property: Archive this service property only if it is no longer active.
- 2 — Edit location: Correct the selected location's details.
- 3 — Add another service location: Add a distinct service location rather than overwriting a different property.
- 4 — Request R-79: Open the linked request to review the inquiry.
- 5 — Estimate E-10: Open the linked estimate to review its scope and status.
- 6 — Job J-8: Open the linked job to review the work. The record numbers shown are examples.
-
Save only the fields you intend to change.
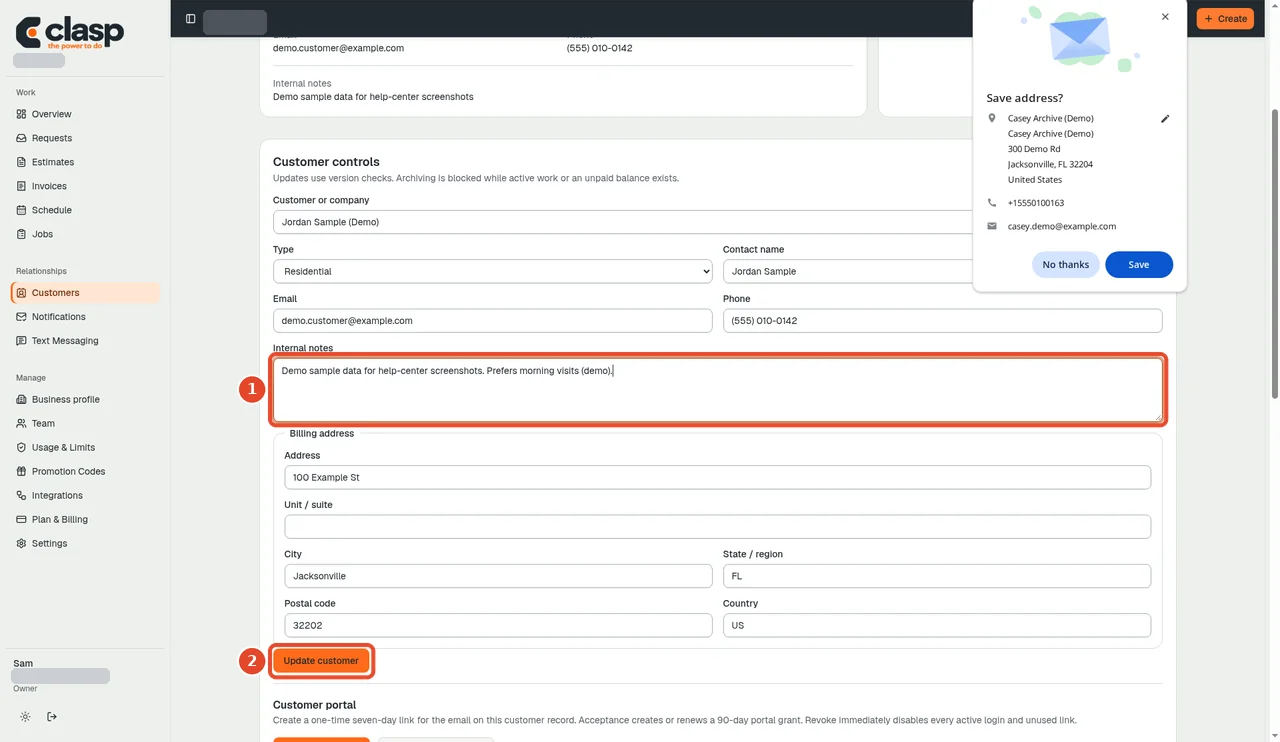
Change only the fields you mean to, then choose Update customer. Numbered controls in this screenshot
- 1 — Internal notes: Enter internal notes appropriate for your team; do not assume they are customer messages.
- 2 — Update customer: Save the intended customer edits and check the result.
The mobile documentation also describes call and email shortcuts. Those shortcuts are different from Clasp's controlled invoice-email or SMS sending actions.
Give a customer portal access
In the intended customer record, find the portal-access controls. Create a link only for that customer, check its expiry, and share it privately. The second picture shows what the invited recipient sees.
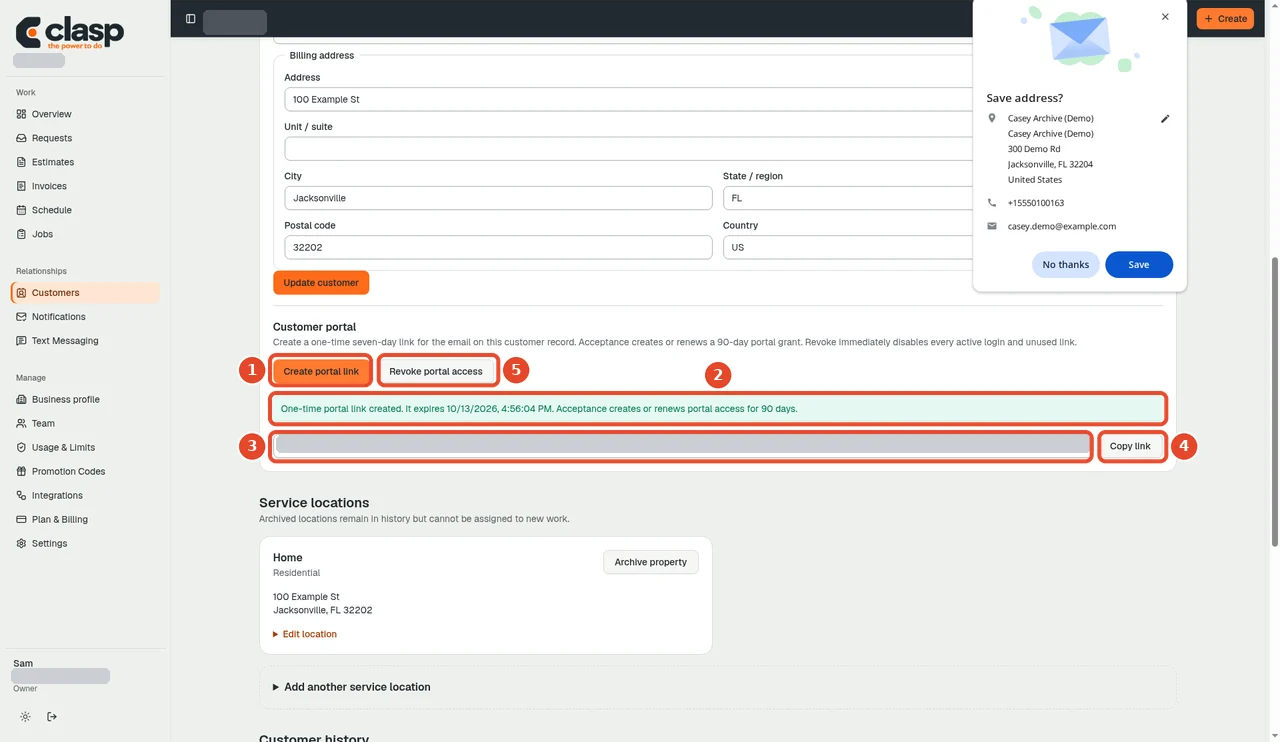
Numbered controls in this screenshot
- 1 — Create portal link: Create access only for the intended customer.
- 2 — Link created and expiry: Check when the link was created and when it expires.
- 3 — Portal link (redacted): Treat the portal URL as private access information; it is obscured in this example.
- 4 — Copy link: Copy it for the intended recipient through your approved sharing process.
- 5 — Revoke portal access: Revoke only when access should end; this is not the next step after copying.
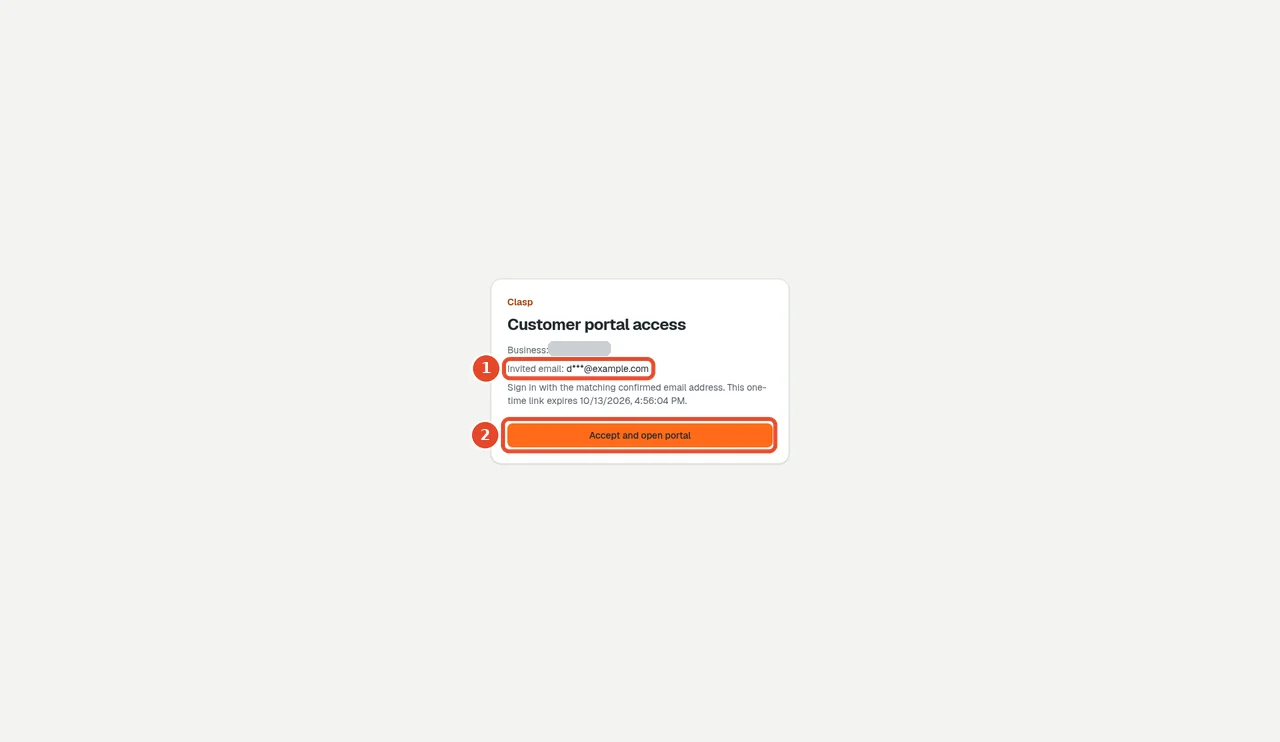
Numbered controls in this screenshot
- 1 — Invited email: The recipient should check that the invited email is theirs.
- 2 — Accept and open portal: The intended recipient accepts the invitation to continue. Do not accept it on someone else's behalf.
Avoid duplicate and mistaken records
Matching a name or phone number alone may be insufficient. Marketplace relay numbers can be shared or temporary. When identity is unclear, request help instead of forcing a merge.
Customer visibility can differ by role; field staff may only see assigned work. The role matrix and full archive/restore workflow remain scheduled for later testing.
Archive or restore a customer
Open the intended customer before archiving. To bring a record back, choose Archived in Customers, open that record, and use Restore customer. A service property's restore control is separate.
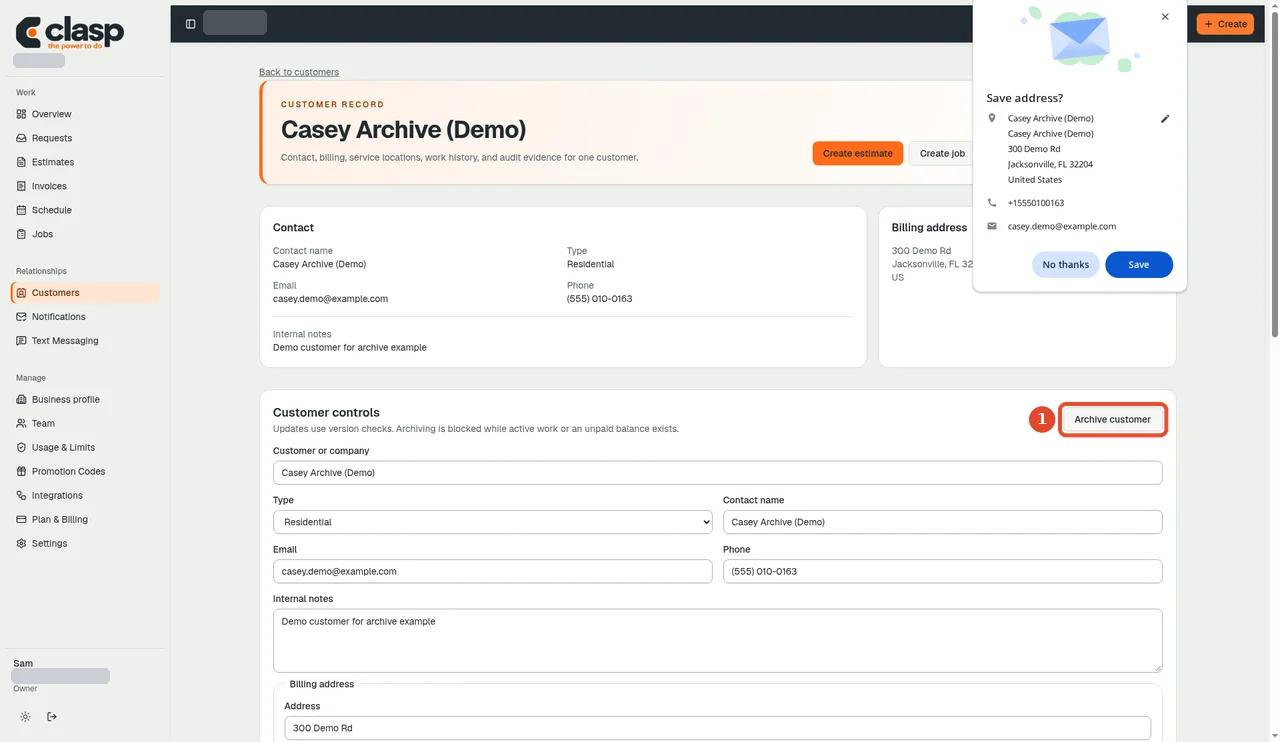
Numbered controls in this screenshot
- 1 — Archive customer: After checking the selected customer, use this action only if you intend to archive that record.
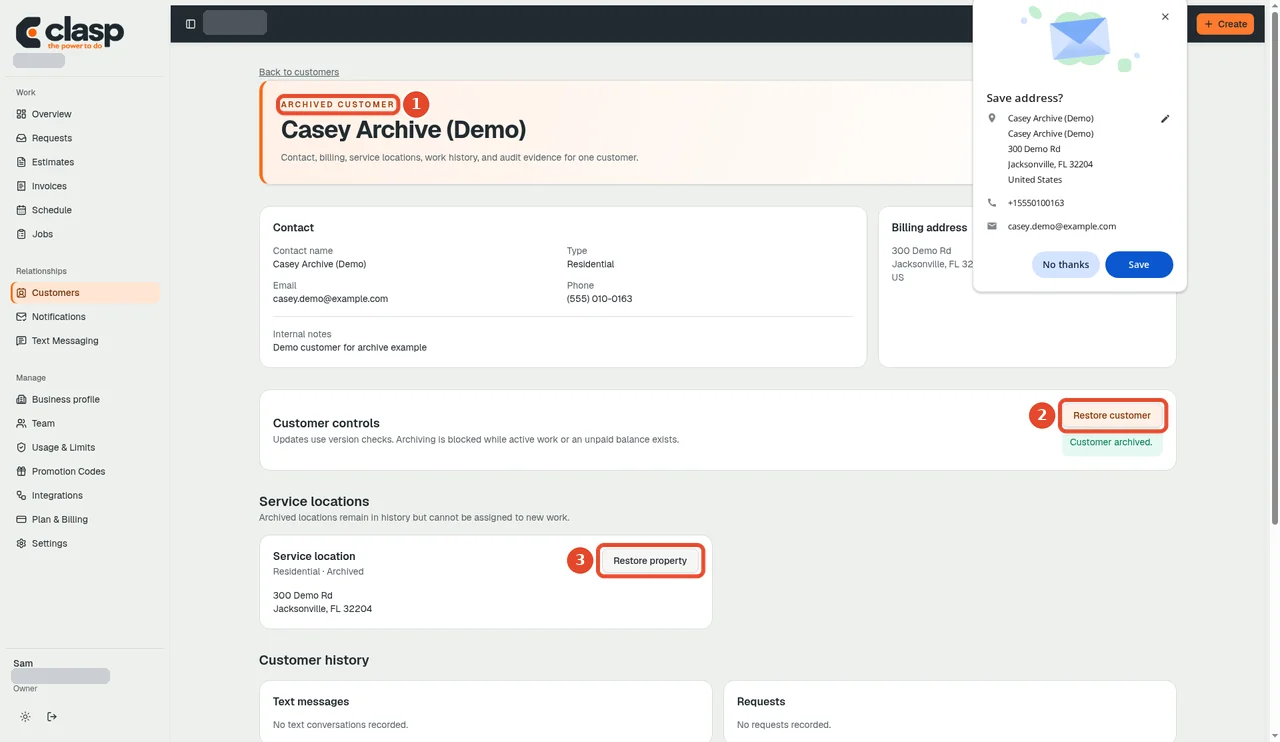
Numbered controls in this screenshot
- 1 — Archived customer label: This confirms you are viewing an archived customer.
- 2 — Restore customer: Restore the customer when it should return to active use.
- 3 — Restore property: Restore a property separately if that service location should be active again.
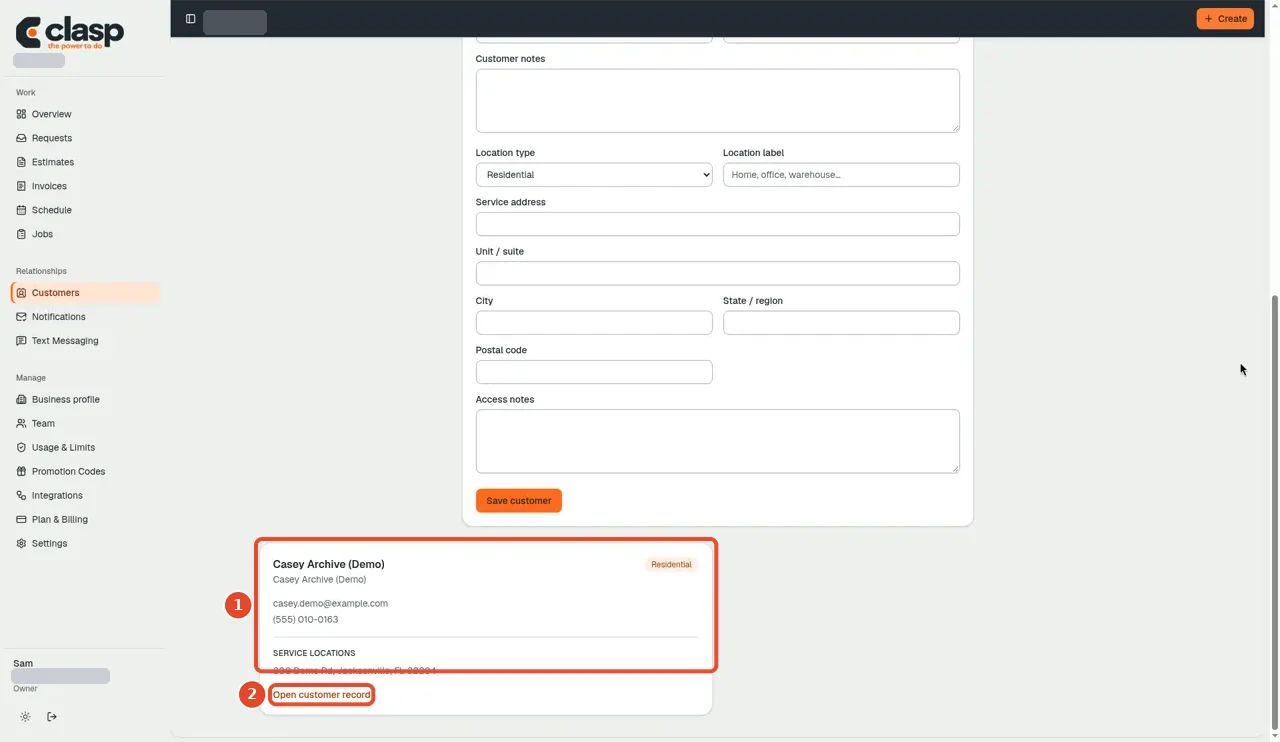
Numbered controls in this screenshot
- 1 — Archived customer card: Find the intended customer in the archived list.
- 2 — Open customer record: Open the record to review it before restoring.