
Manage jobs and scheduled visits
Understand the difference between the work and the appointment.
The numbers in these website screenshots identify controls and statuses, not a required click sequence. Example records and amounts are illustrative; mobile layouts may differ.
Jobs and visits
A job holds the work context. A visit places work on the schedule and can be assigned to a team member. A lead's requested appointment time is not automatically a confirmed visit.
Create a job
Choose New job from Jobs, enter the work details, and save. After the confirmation, open the saved job instead of submitting the creation form again.
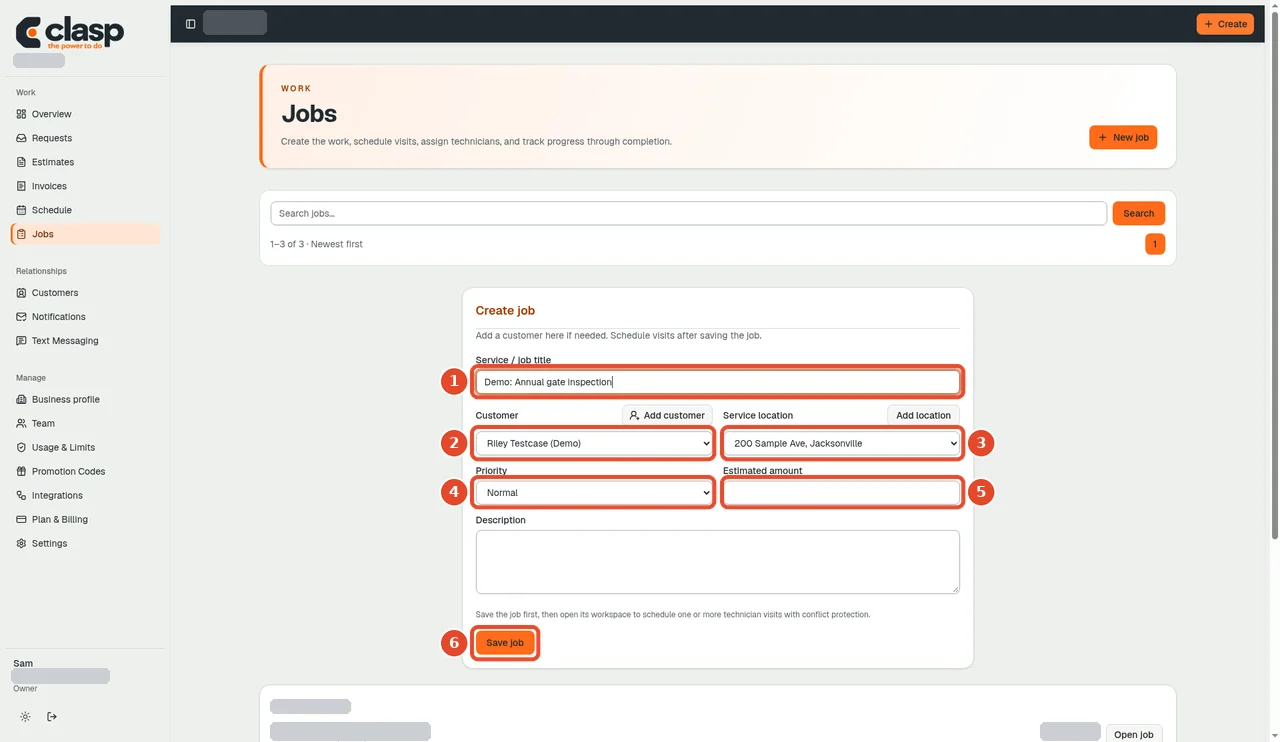
Numbered controls in this screenshot
- 1 — Service / job title: Name the work clearly.
- 2 — Customer: Choose the intended customer.
- 3 — Service location: Select the property where the work will take place.
- 4 — Priority: Set the real priority.
- 5 — Estimated amount: Enter an appropriate estimate if used; it is not an issued invoice.
- 6 — Save job: Save once the required fields are complete.
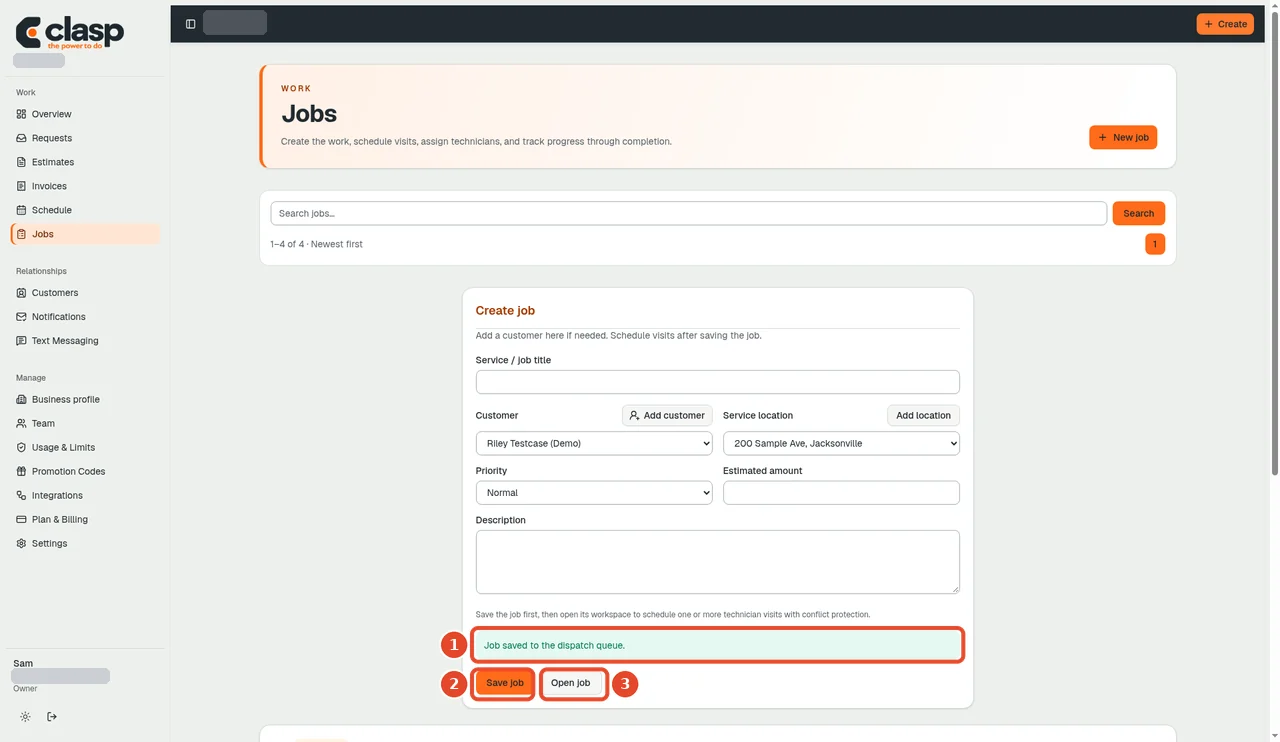
Numbered controls in this screenshot
- 1 — Job saved to the dispatch queue: Check that the job was saved to the dispatch queue.
- 2 — Save job: The creation form remains visible; do not save it again merely because it is pictured.
- 3 — Open job: Open the saved job to review it or arrange a visit.
Plan the work
-
Open Jobs and select the relevant job.
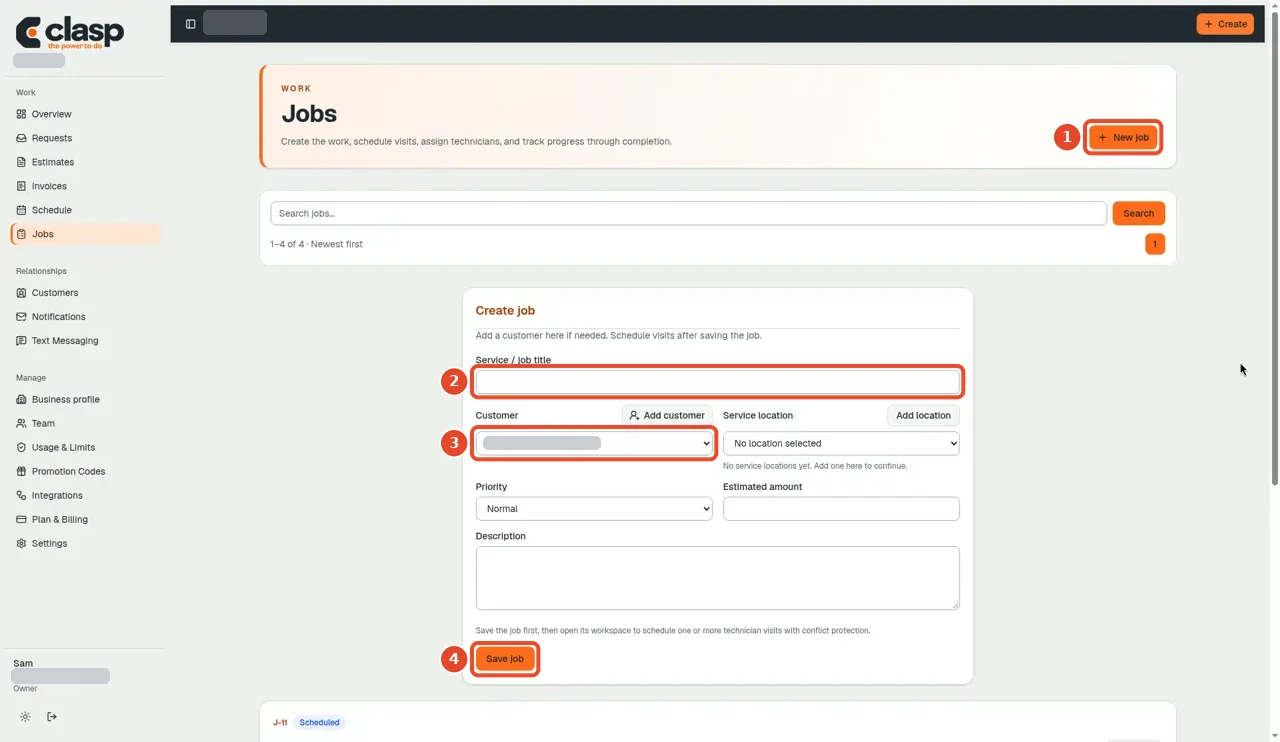
Jobs lists your work and includes the form for creating a job. Numbered controls in this screenshot
- 1 — New job: Open the new-job form when the work does not have a record yet.
- 2 — Service / job title: Describe the work clearly.
- 3 — Customer: Choose the correct customer.
- 4 — Save job: Save after completing and reviewing the required details.
-
Review its customer, location, and scope.
-
Use the available visit controls to schedule or assign the work.
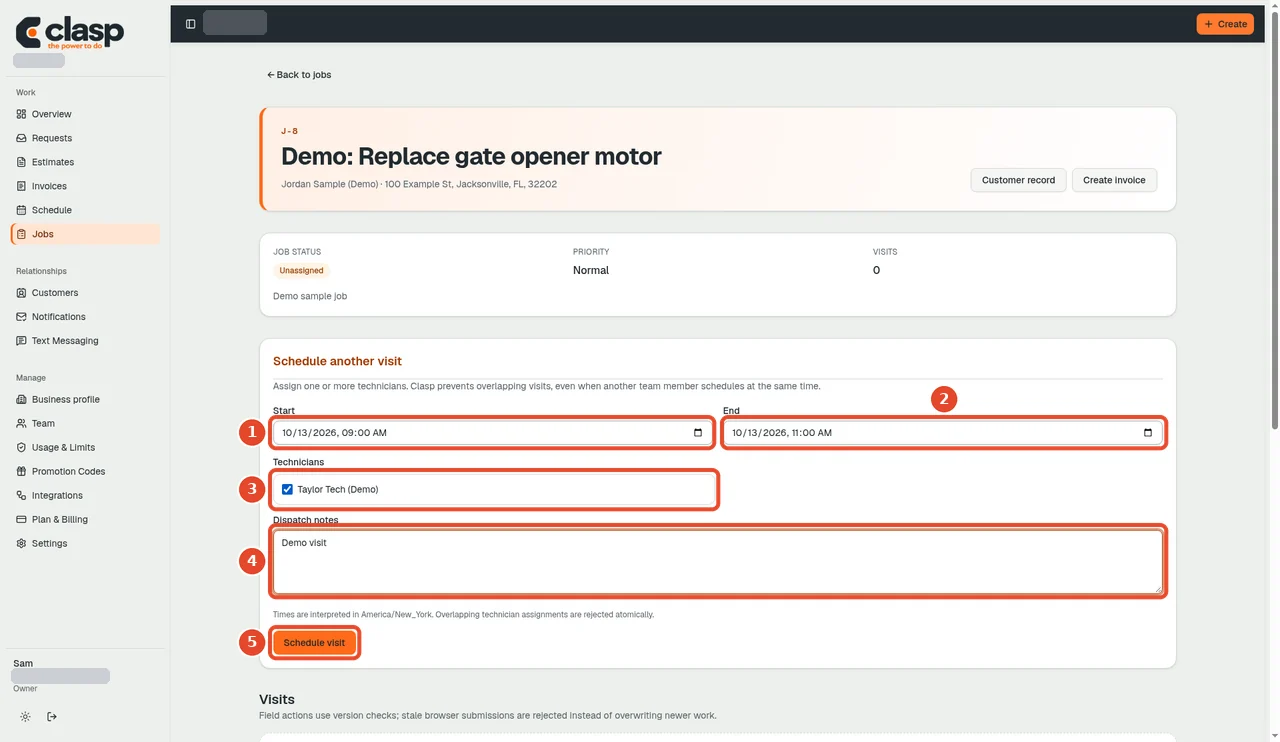
Set the visit's start and end, choose a technician and select Schedule visit. Numbered controls in this screenshot
- 1 — Start: Choose the visit start date and time.
- 2 — End: Choose the intended end date and time.
- 3 — Technician: Select the team member who should attend.
- 4 — Dispatch notes: Add relevant internal dispatch information.
- 5 — Schedule visit: Save the appointment and check the confirmation and schedule.
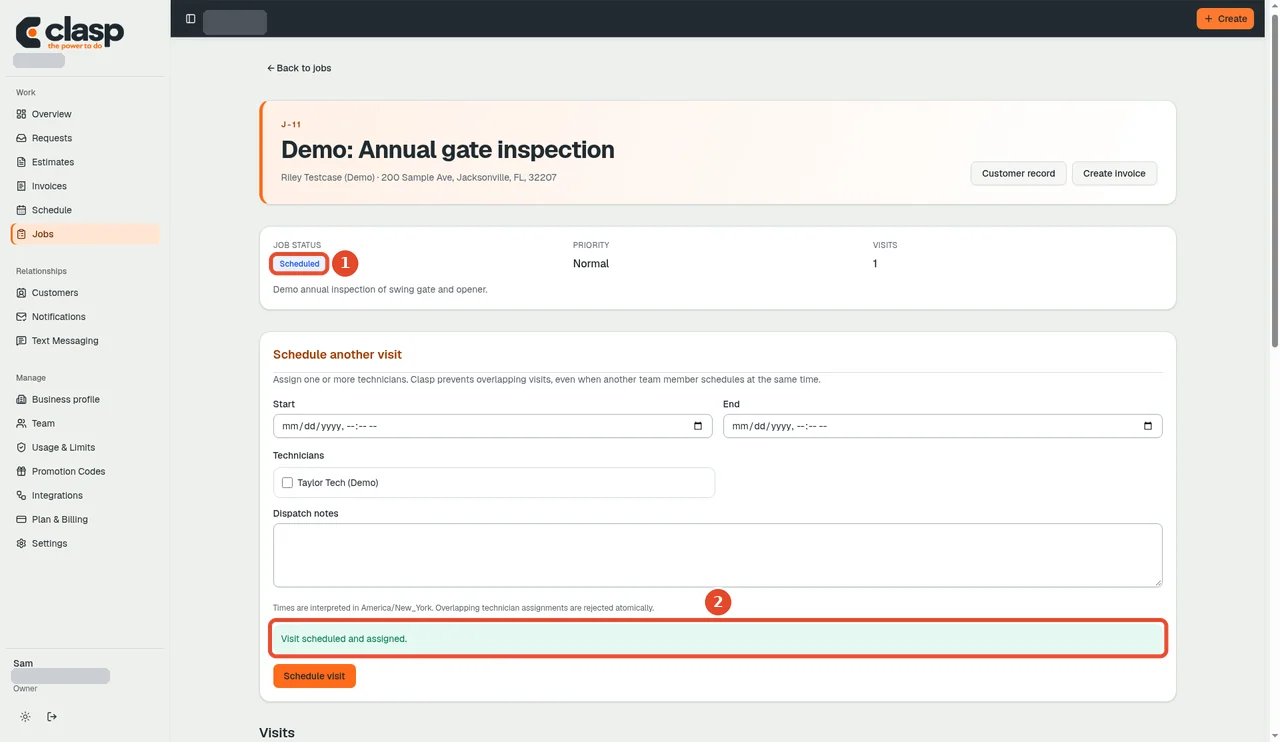
After scheduling, the job shows Scheduled and confirms the assignment. Numbered controls in this screenshot
- 1 — Scheduled status: This is the new scheduled state.
- 2 — Visit scheduled and assigned: Confirm the visit was scheduled and assigned as intended; these two callouts are confirmation labels, not buttons.
-
Review Schedule for the resulting appointment.
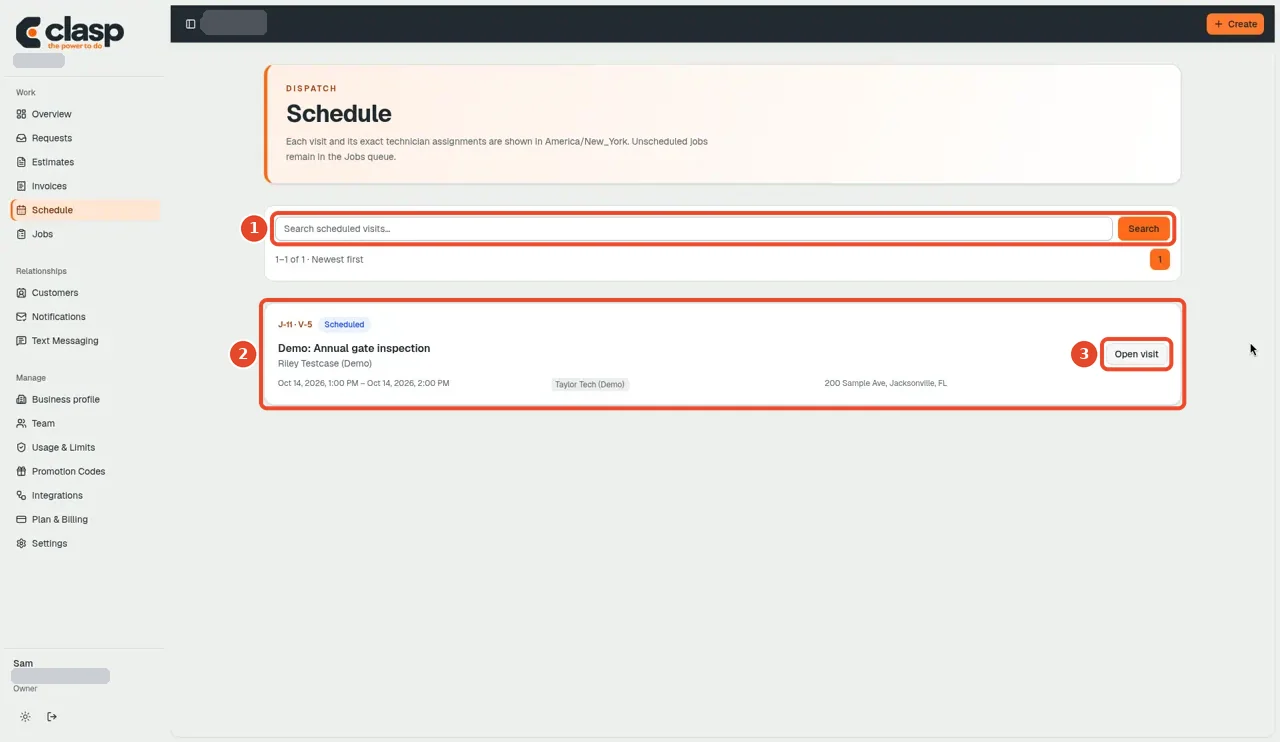
The scheduled visit appears on Schedule; use Open visit to view it. Numbered controls in this screenshot
- 1 — Search scheduled visits: Find the intended scheduled visit.
- 2 — Scheduled visit: Confirm its displayed timing and assignment.
- 3 — Open visit: Open the visit before changing its status or recording work.
The mobile documentation describes a day list with previous/next-day navigation.
During the visit
The website visit controls below show scheduled, in-progress and completed examples. Use only the action that matches the actual work. Mobile also documents en route, start, pause and complete, but its layout and available actions may differ. Internal notes are not automatically customer messages.
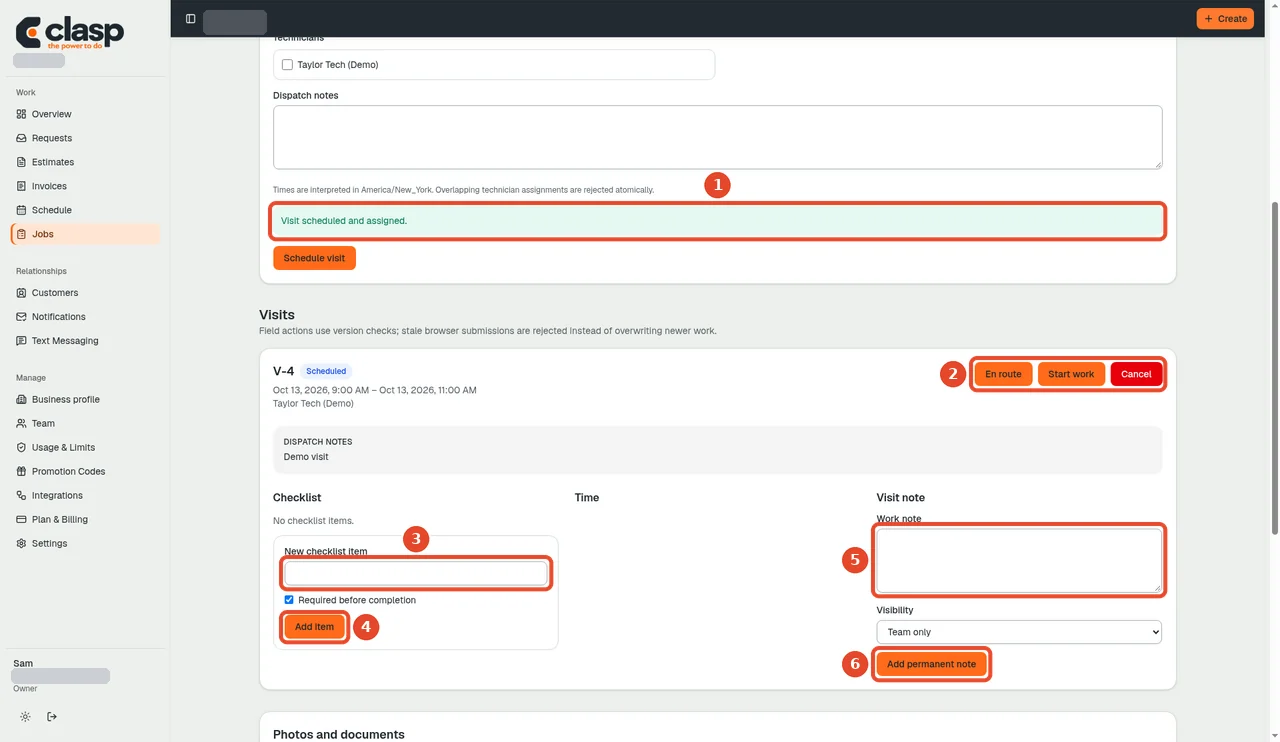
Numbered controls in this screenshot
- 1 — Visit scheduled and assigned: Review the scheduling and assignment confirmation.
- 2 — En route / Start work / Cancel: Choose the action that reflects reality: travel, start work, or cancel. These are alternatives.
- 3 — New checklist item: Enter one checklist task.
- 4 — Add item: Add that task to the checklist.
- 5 — Work note: Write an appropriate internal work note.
- 6 — Add permanent note: Save only a note you intend to keep in the work history.
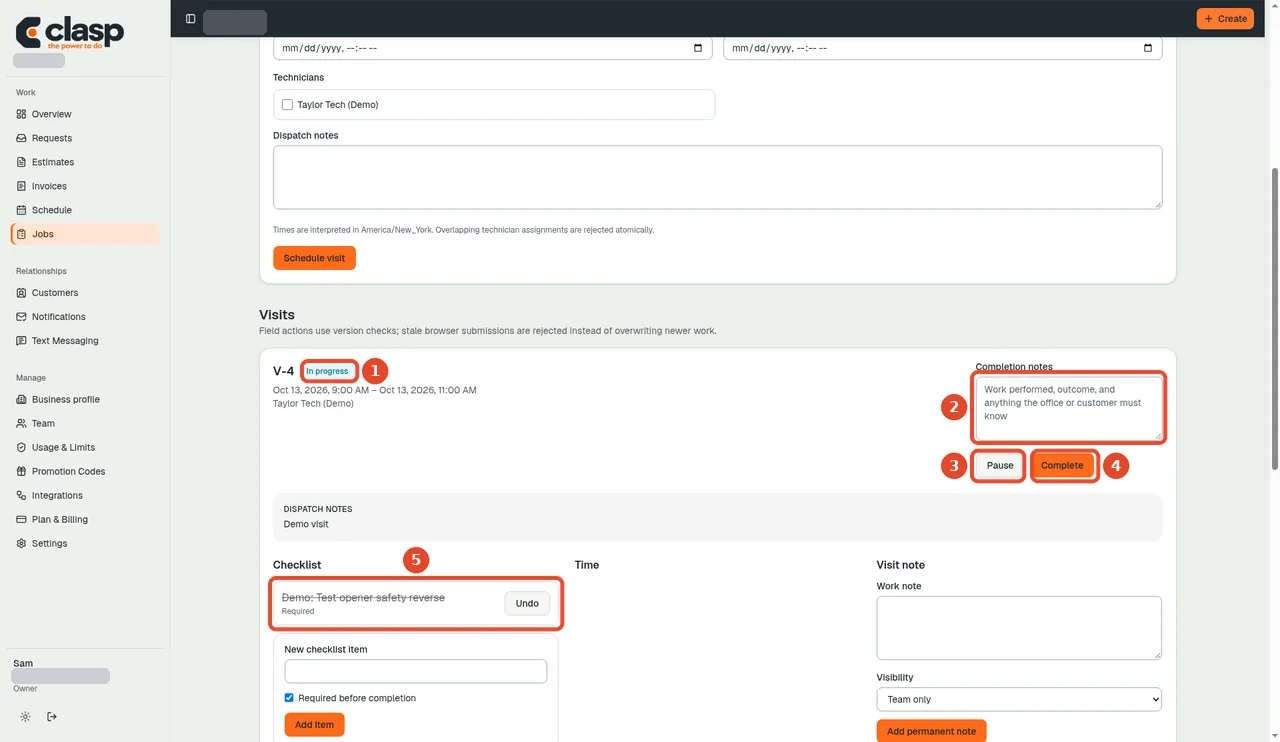
Numbered controls in this screenshot
- 1 — In progress status: This label confirms the visit is in progress.
- 2 — Completion notes: Enter a factual completion summary when finishing.
- 3 — Pause: Pause only if work is temporarily stopping.
- 4 — Complete: Complete only when the visit is actually finished.
- 5 — Completed checklist item (Undo): Undo a checklist completion only if it was marked incorrectly.
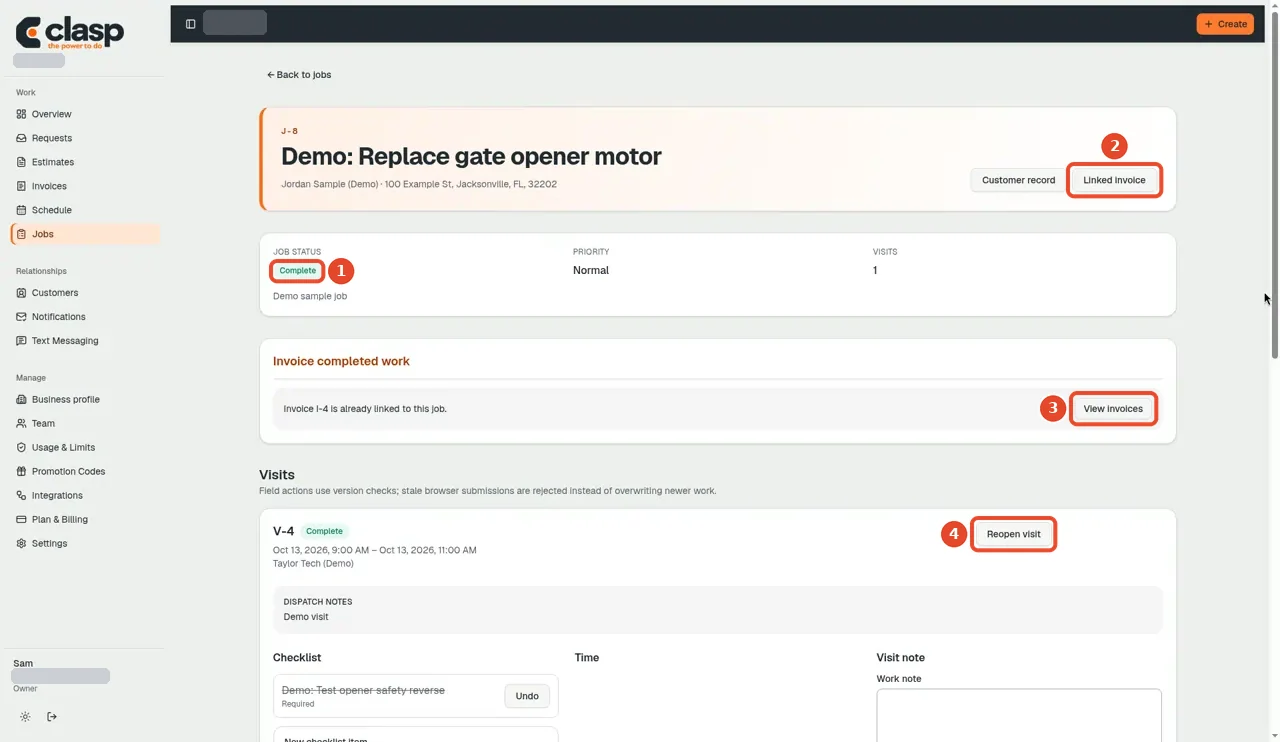
Numbered controls in this screenshot
- 1 — Complete status: Review the completed state.
- 2 — Linked invoice: Open the related invoice when one exists.
- 3 — View invoices: Review invoices without assuming completion automatically sent one.
- 4 — Reopen visit: Reopen only if the completed visit needs further work.
Checklists, notes and attachments
Use the job's checklist to track individual tasks. To attach a file, choose it, select the relevant visit if applicable, and upload. A quarantined or scan-pending result is not an available, cleared attachment.
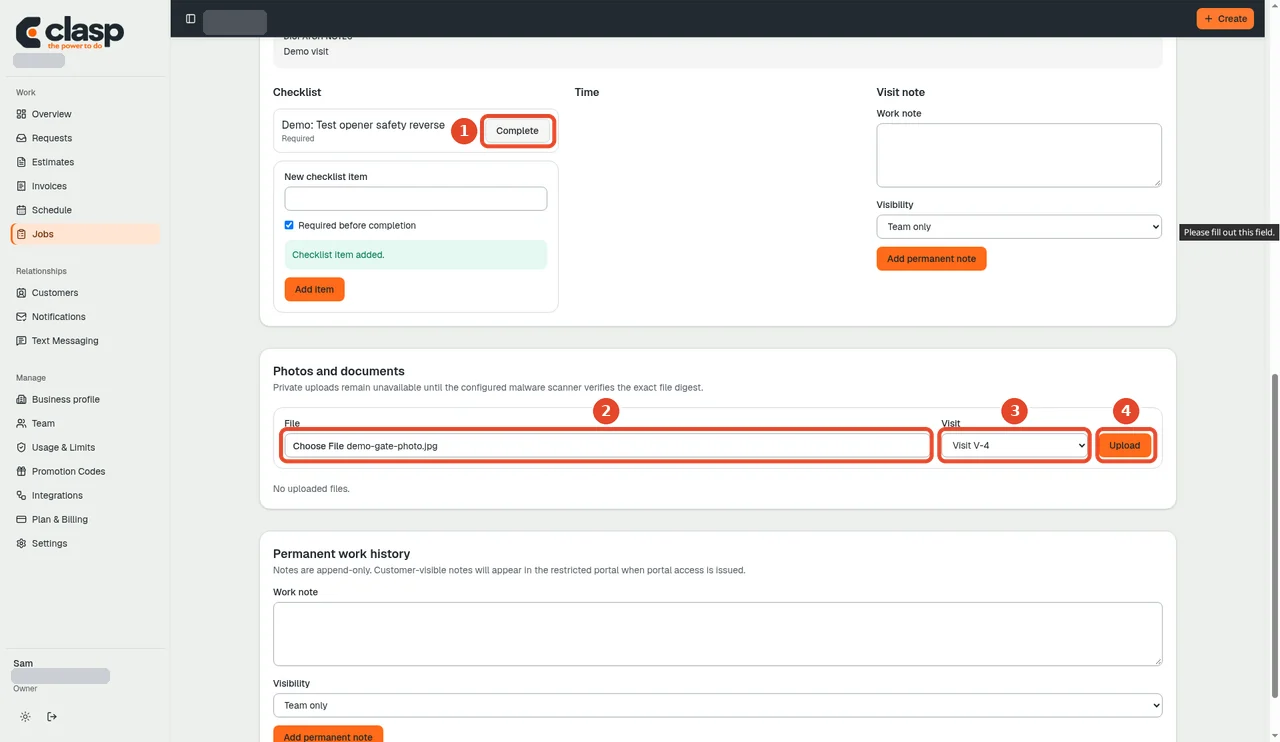
Numbered controls in this screenshot
- 1 — Complete checklist item: Mark a task complete only after doing the work.
- 2 — Choose File: Choose a file permitted by the live field guidance.
- 3 — Visit: Select the relevant visit when applicable.
- 4 — Upload: Upload the selected file and inspect the returned status.
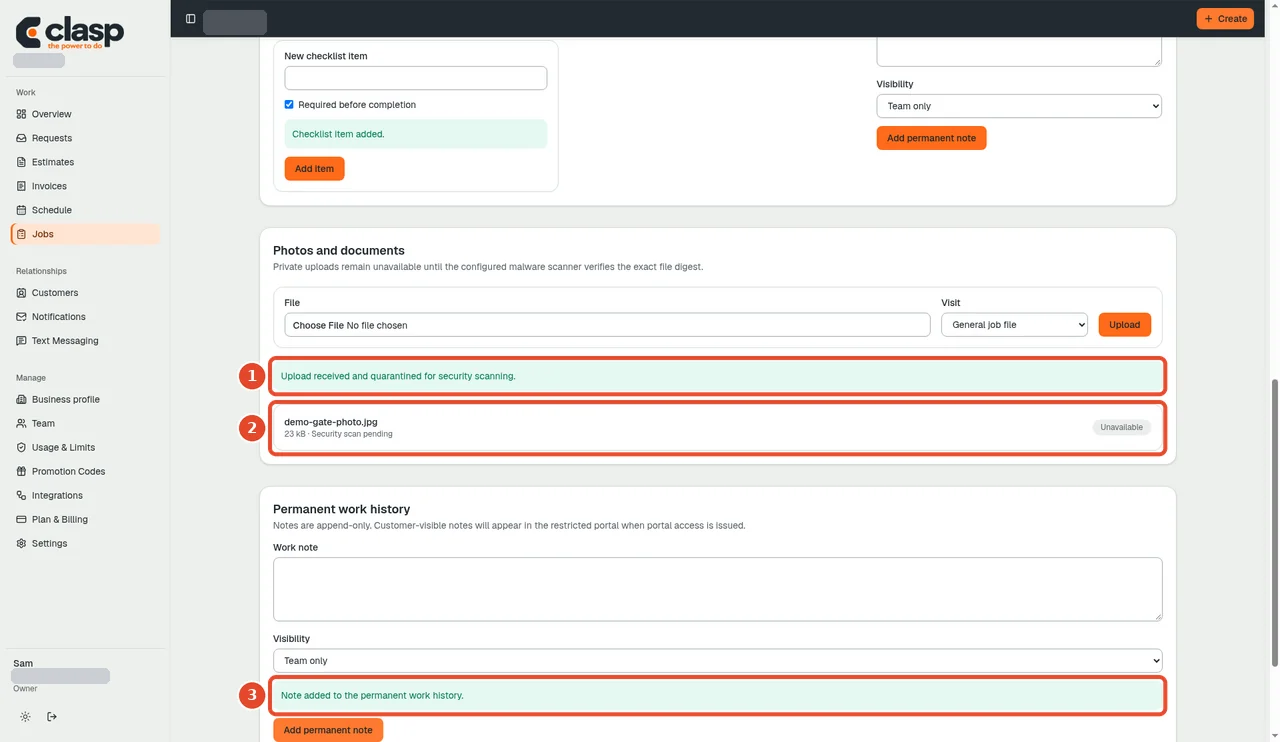
Numbered controls in this screenshot
- 1 — Upload received and quarantined: The file was received but remains quarantined; this is not a clean scan result.
- 2 — Uploaded file (scan pending): Wait for the scan result before treating it as an available attachment.
- 3 — Note added to work history: This confirms a separate work-note action, not attachment scan completion.
Timers, conflicts and reassignment still need their own walkthroughs. These screenshots do not establish GPS tracking, route optimization, recurring bookings or payroll.