
Save reusable terms and contracts
Create approved terms once, then review and reuse them on estimates.
The numbers in these website screenshots identify controls and statuses, not a required click sequence. Example records and amounts are illustrative; mobile layouts may differ.
Create a preset
Open Settings → Saved terms and contracts. Under Add a preset, name the template, enter your business-approved wording, and choose Save preset.
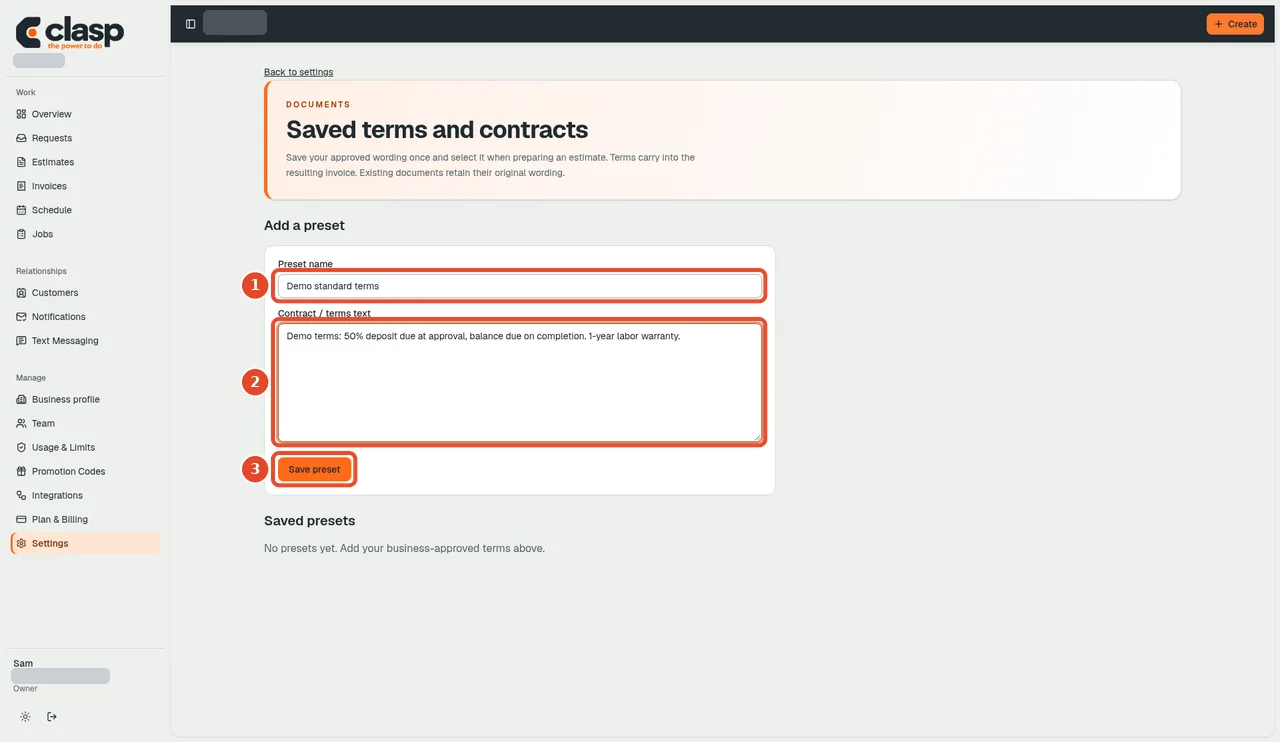
Numbered controls in this screenshot
- 1 — Preset name: Choose a name that identifies when your team should use this wording.
- 2 — Contract / terms text: Enter business-approved terms. The demo deposit and warranty wording is illustrative, not a recommended contract.
- 3 — Save preset: Save the preset and check for its appearance in the list.
The pictured deposit and warranty are demo text, not recommended terms for your business. Use wording your business has reviewed and approved.
Confirm and use the saved preset
Check the Saved presets section for the new name and wording. On an estimate, select this preset and use Replace with preset only if you intend to replace that draft's existing terms.
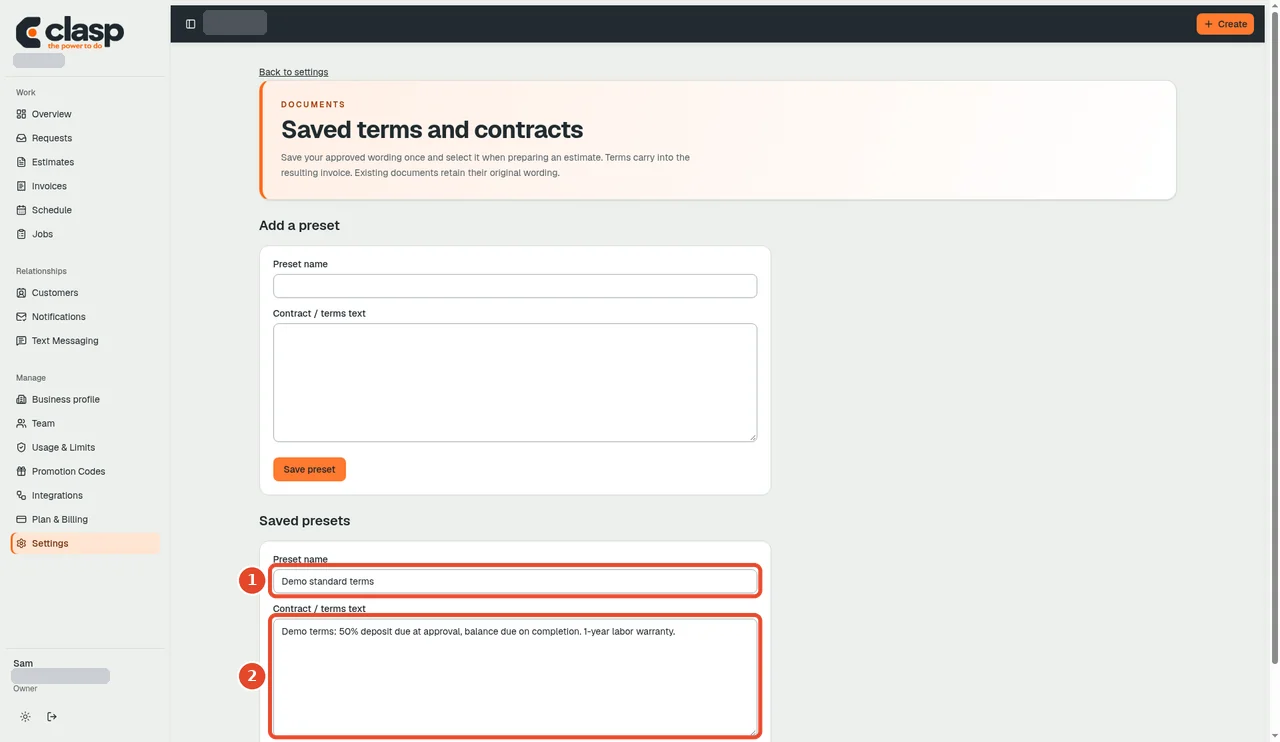
Numbered controls in this screenshot
- 1 — Saved preset name: Confirm the saved preset has the intended name.
- 2 — Saved terms text: Review the saved wording before applying it to an estimate.
See create an estimate for the document workflow. Current source describes terms carrying into the resulting invoice while existing documents keep their original wording. Editing a preset is not a bulk update of issued documents.
What saving does not do
Saving a preset does not send a contract, obtain customer acceptance or establish that its wording meets your business's legal needs. Application and persistence will be checked in the later workflow phase.