
Create, save, and share an estimate
Prepare a quote without confusing saving with sending.
The numbers in these website screenshots identify controls and statuses, not a required click sequence. Example records and amounts are illustrative; mobile layouts may differ.
Prepare the draft
-
Open Estimates.
-
Use the available creation form and select the relevant customer/request.
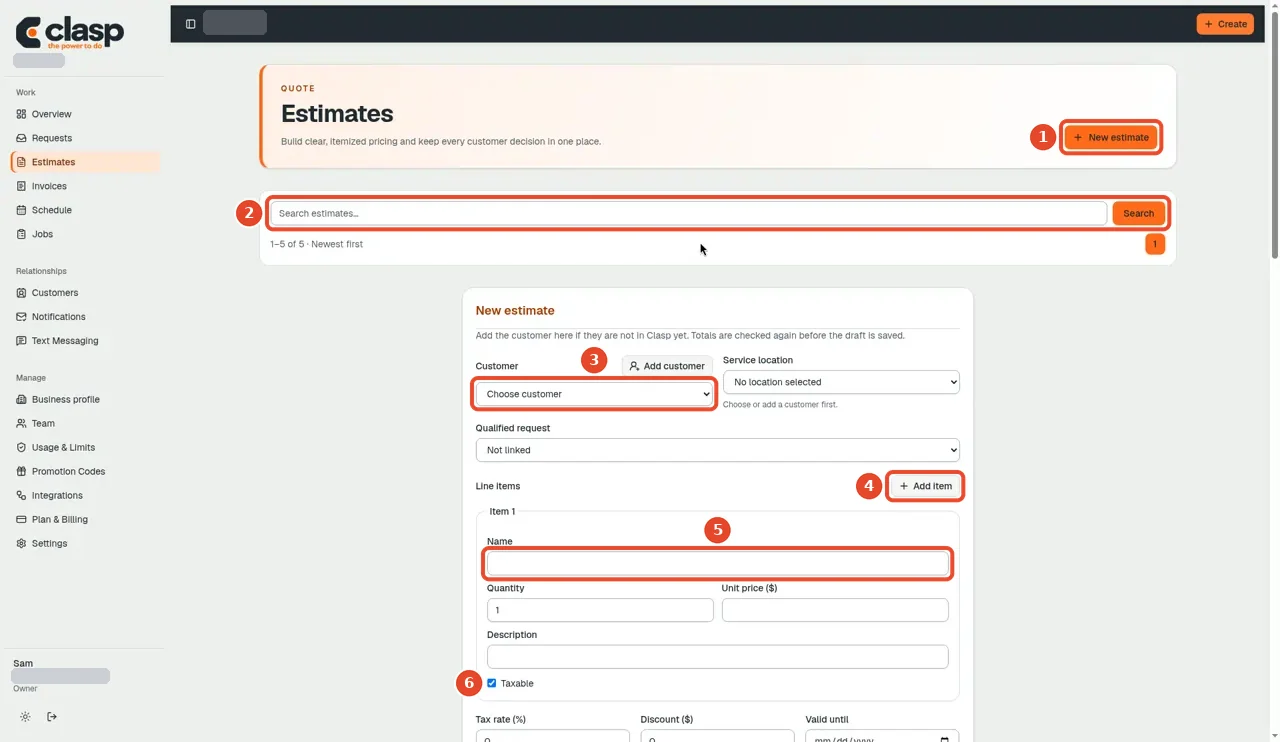
Start a new estimate on Estimates, choose the customer, then add line items. Numbered controls in this screenshot
- 1 — New estimate: Start a new draft.
- 2 — Search estimates: Check for an existing estimate first.
- 3 — Customer: Choose the correct customer.
- 4 — Add item: Add another line item when required.
- 5 — Item name: Describe the specific service or product.
- 6 — Taxable: Set tax treatment according to the business's applicable requirements; do not copy the demo selection blindly.
-
Enter the scope, line items, quantities, and applicable amounts.
-
Review totals and terms.
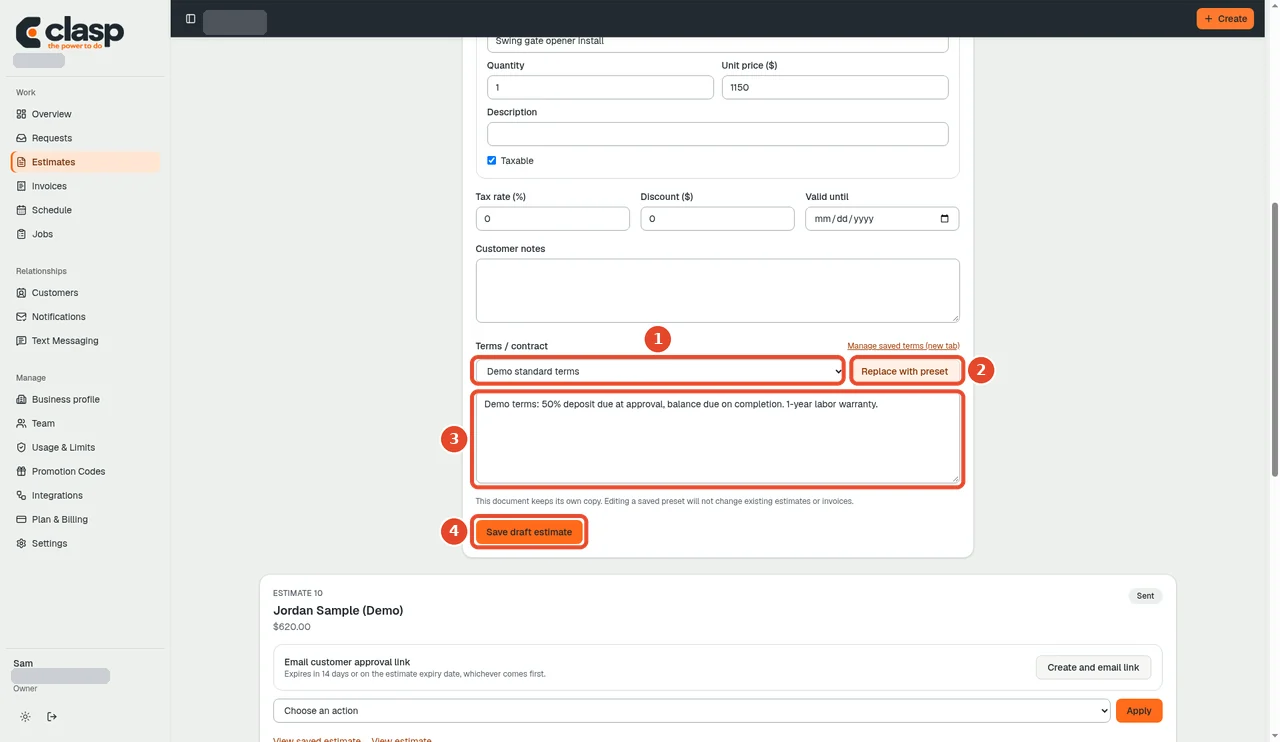
Choose a saved terms preset and select Replace with preset to fill in the terms. Numbered controls in this screenshot
- 1 — Saved terms preset: Choose a business-approved saved preset if you want to reuse it.
- 2 — Replace with preset: Replace the draft's current terms only if you intend to overwrite that text.
- 3 — Terms / contract text: Review and adjust the resulting wording before saving.
- 4 — Save draft estimate: Save the draft; it is not yet a customer acceptance or email.
-
Choose Save draft estimate.
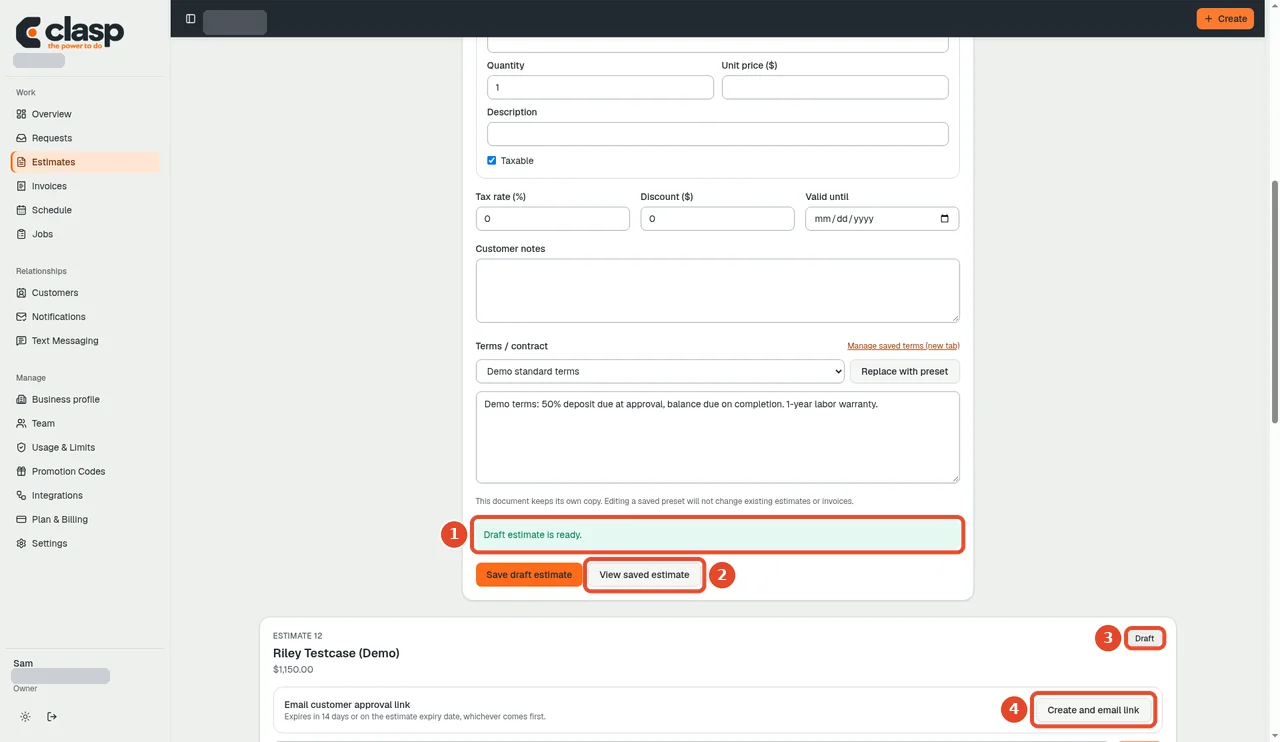
Saving creates a draft; sending it is a separate action. Numbered controls in this screenshot
- 1 — Draft estimate is ready: Check the save confirmation.
- 2 — View saved estimate: Open the saved customer-facing document.
- 3 — Draft status: This is still a draft status.
- 4 — Create and email link: Use the explicit sharing action only when the estimate and recipient are ready.
For an editable existing estimate, make your changes and choose Save estimate.
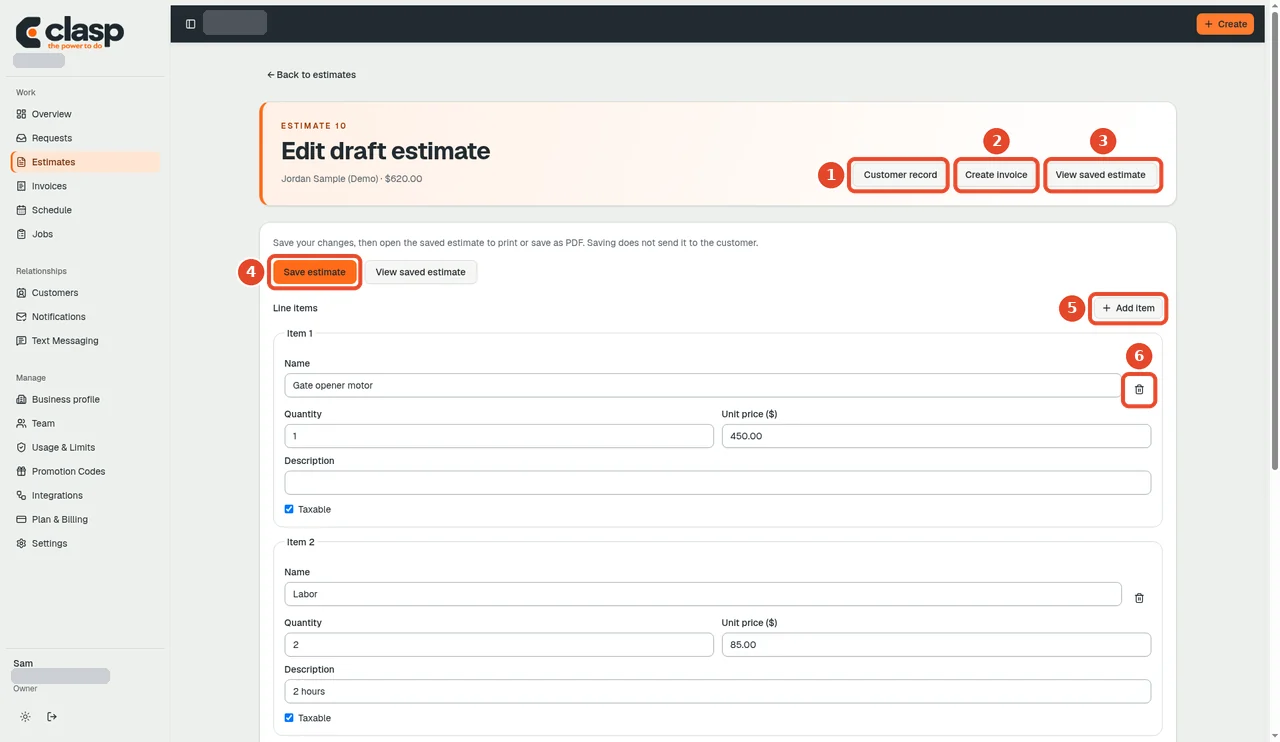
Numbered controls in this screenshot
- 1 — Customer record: Review the linked customer.
- 2 — Create invoice: This is a separate invoice action, not required to save an edit.
- 3 — View saved: Open the saved document rather than printing the editor.
- 4 — Save estimate: Save the intended changes.
- 5 — Add item: Add a line item if needed.
- 6 — Remove item: Remove only the intended item, then review totals before saving.
Open the saved document
After saving, open the saved estimate document before printing or downloading a PDF. The edit screen and the customer-facing document serve different purposes. See print and save PDF.
Sharing and decisions
The source includes an explicit sharing action and a customer estimate-decision page. Saving a draft does not automatically send it or mean that the customer accepted it.
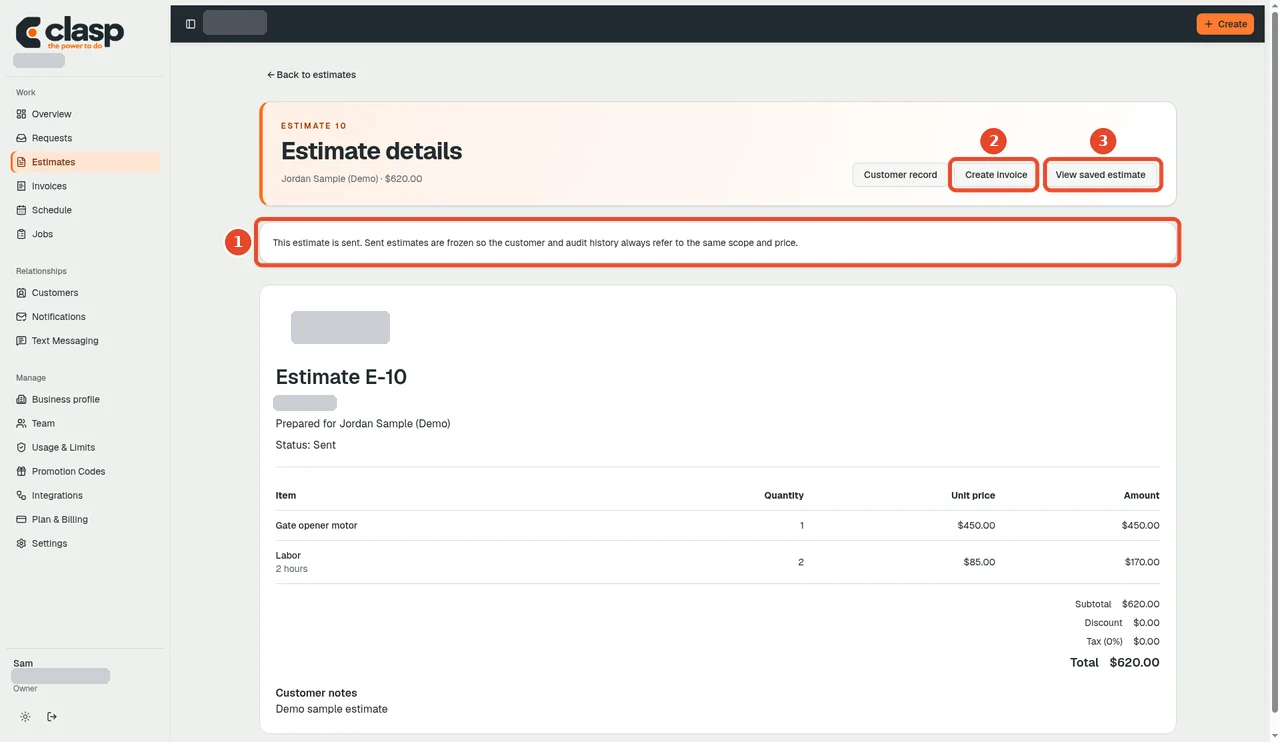
Numbered controls in this screenshot
- 1 — Sent notice: Review the recorded sharing state; it does not prove the customer read or accepted the estimate.
- 2 — Create invoice: Create an invoice only when appropriate for the work and estimate state.
- 3 — View saved estimate: Open the saved document to review what was prepared.
The current sharing controls, delivery status, link lifetime, acceptance/decline, and follow-on job/invoice actions will be tested as one workflow before this guide is approved.
Use synthetic data when recording this tutorial; do not publish real customer prices or contact details.
Reuse approved wording
Save reusable terms and contracts in Settings, then select the appropriate preset when preparing an estimate. Review it before replacing this draft's existing terms.