
Prepare and email an invoice
Separate draft creation, issuing, sending, and payment.
The numbers in these website screenshots identify controls and statuses, not a required click sequence. Example records and amounts are illustrative; mobile layouts may differ.
Prepare and save
Open Invoices and use the available invoice-start options for the work being billed. The source includes a Save draft invoice action and paths from accepted estimates and completed jobs.
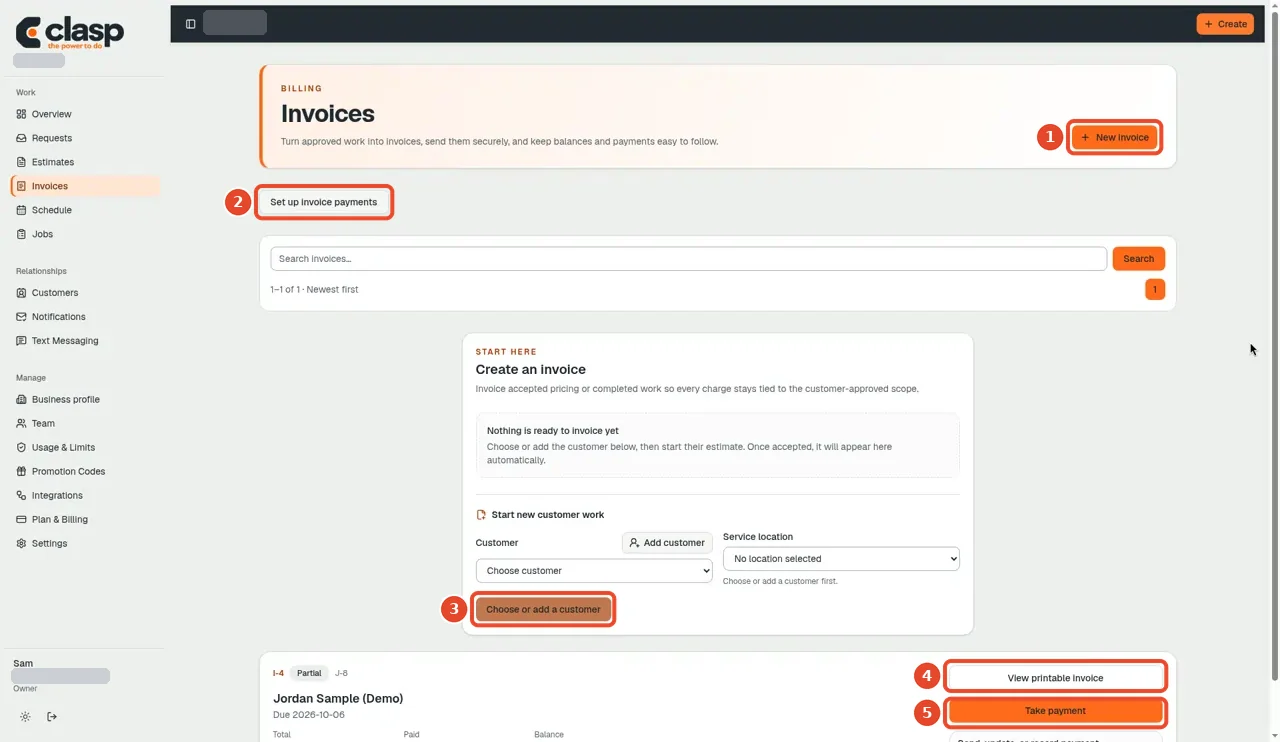
Numbered controls in this screenshot
- 1 — New invoice: Begin the appropriate invoice draft.
- 2 — Set up invoice payments: Review online-payment setup separately from preparing an invoice.
- 3 — Choose or add a customer: Select the correct customer or add one if genuinely missing.
- 4 — View printable invoice: Open the saved printable document.
- 5 — Take payment: Use the payment action only for an actual payment workflow; printing does not require it.
Check the customer, line items, due date, notes, and total. Current draft-entry options need a fresh walkthrough; older parity notes may not describe later additions.
Email the customer
-
Open the intended invoice.
-
Confirm the customer's email address in the invoice details.
-
Review the saved document and amounts.
-
Use the explicit email action only when ready.
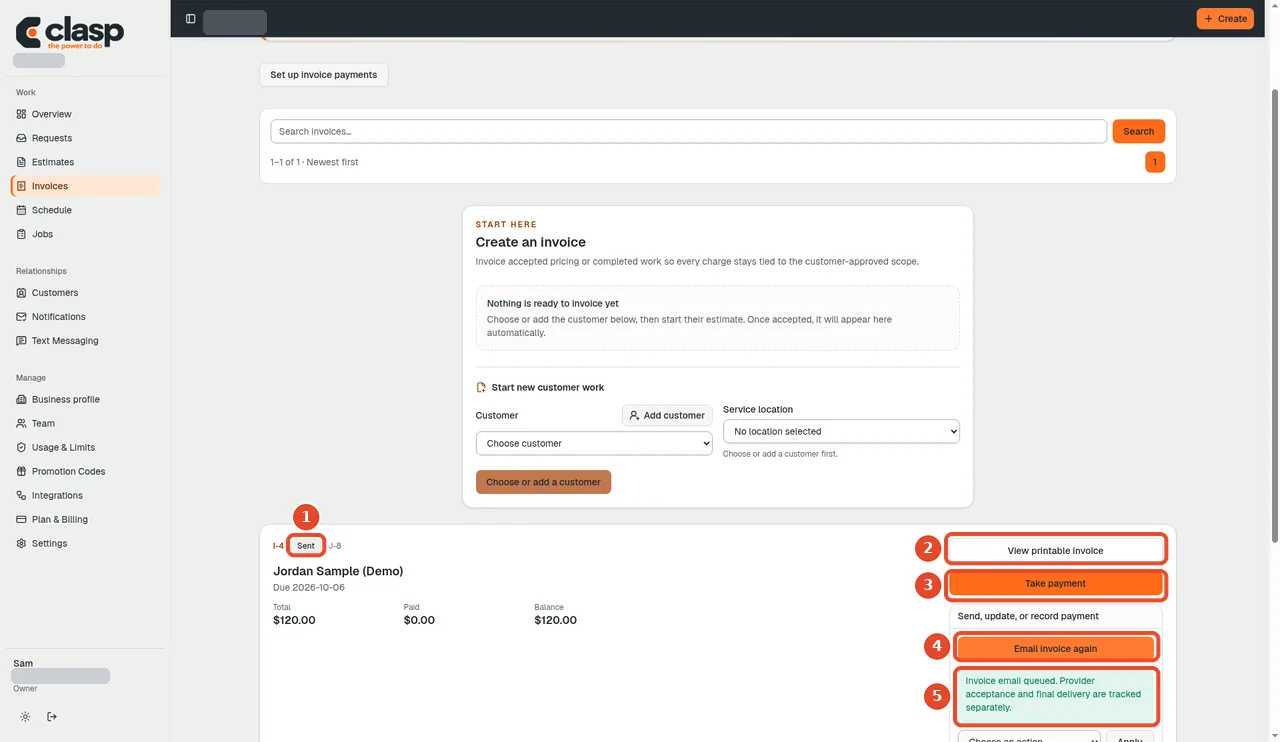
After issuing, the invoice shows Sent and the email is queued; queued is not the same as delivered. Numbered controls in this screenshot
- 1 — Sent status: This is the invoice's issued/sent state, not recipient inbox proof.
- 2 — View printable invoice: Open the printable document.
- 3 — Take payment: Handle payment as a separate action.
- 4 — Email invoice again: Resend only when intended, to avoid unnecessary duplicate emails.
- 5 — Invoice email queued: Queued means waiting for delivery processing; check Notifications for later delivery status.
For a draft, the source labels this action Issue and email invoice. An already-issued invoice can offer a resend action.
Saving is not sending. A queued or accepted email is not the same as a delivered email. Review Notifications for the recorded delivery state.
Payment is a separate step
A no-card Clasp trial does not activate customer card collection. Online payment availability depends on the business's payment setup. Never mark an invoice paid merely because it was emailed.
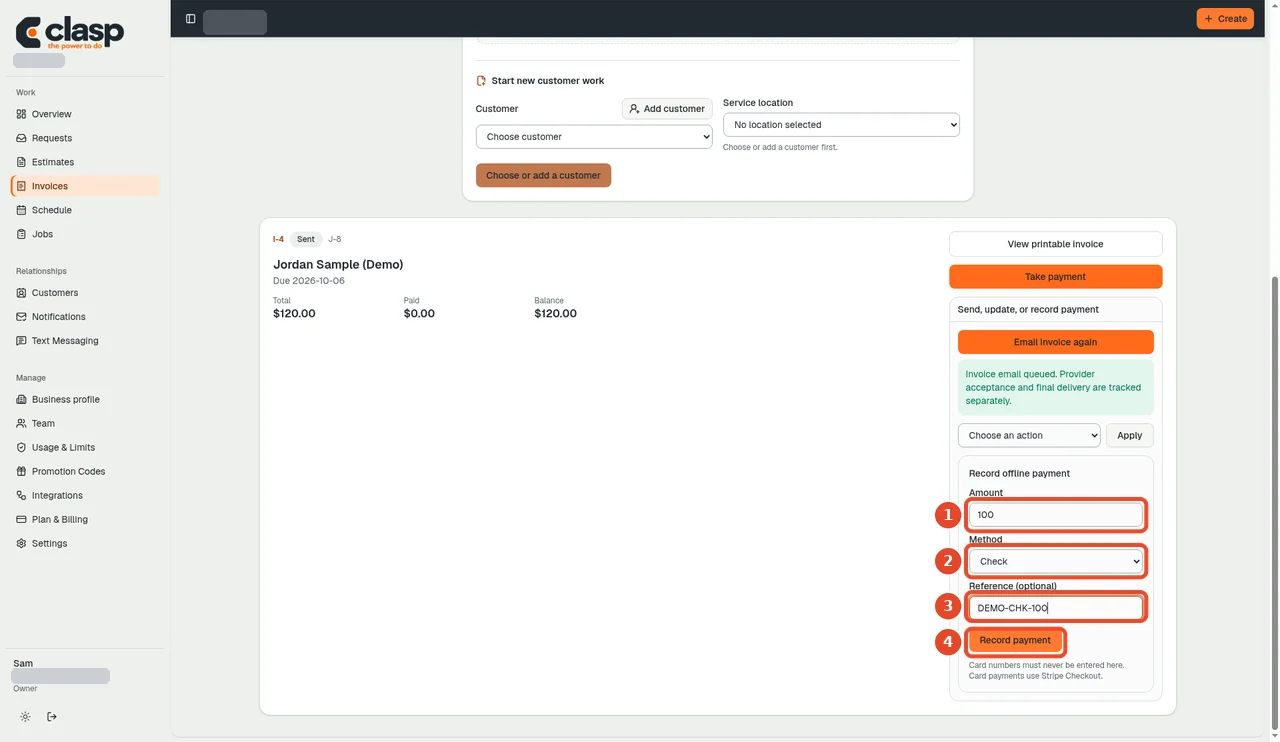
Numbered controls in this screenshot
- 1 — Amount: Enter only the amount actually received.
- 2 — Method: Choose the real payment method.
- 3 — Reference (optional): Add a useful payment reference if available.
- 4 — Record payment: Record a payment only after receipt. This updates the invoice balance; it is not a substitute for charging a card.
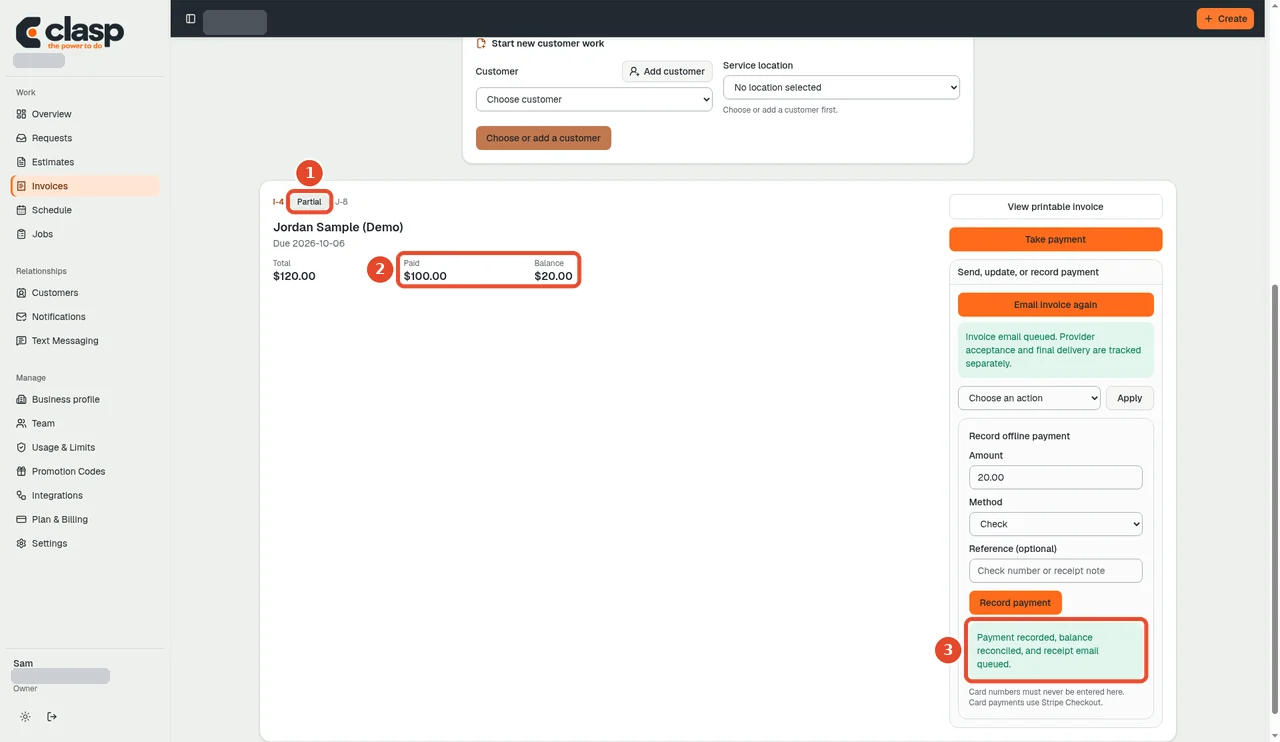
Numbered controls in this screenshot
- 1 — Partial status: This example has a partial payment, not a fully paid invoice.
- 2 — Paid and balance: Compare received payments with the remaining balance.
- 3 — Payment recorded: Check the confirmation against the payment you intended to record.
The invoice-to-email-to-customer journey remains for later testing. Importing these supplied screenshots does not send an invoice or establish delivery.
Check online-payment setup
Open Settings → Card payments to review the business's Stripe or Square payment-provider setup. The example below shows incomplete Stripe setup and disabled card charges; do not treat it as an active payment account. Square has its own connection, location-selection, and signed-webhook readiness states.
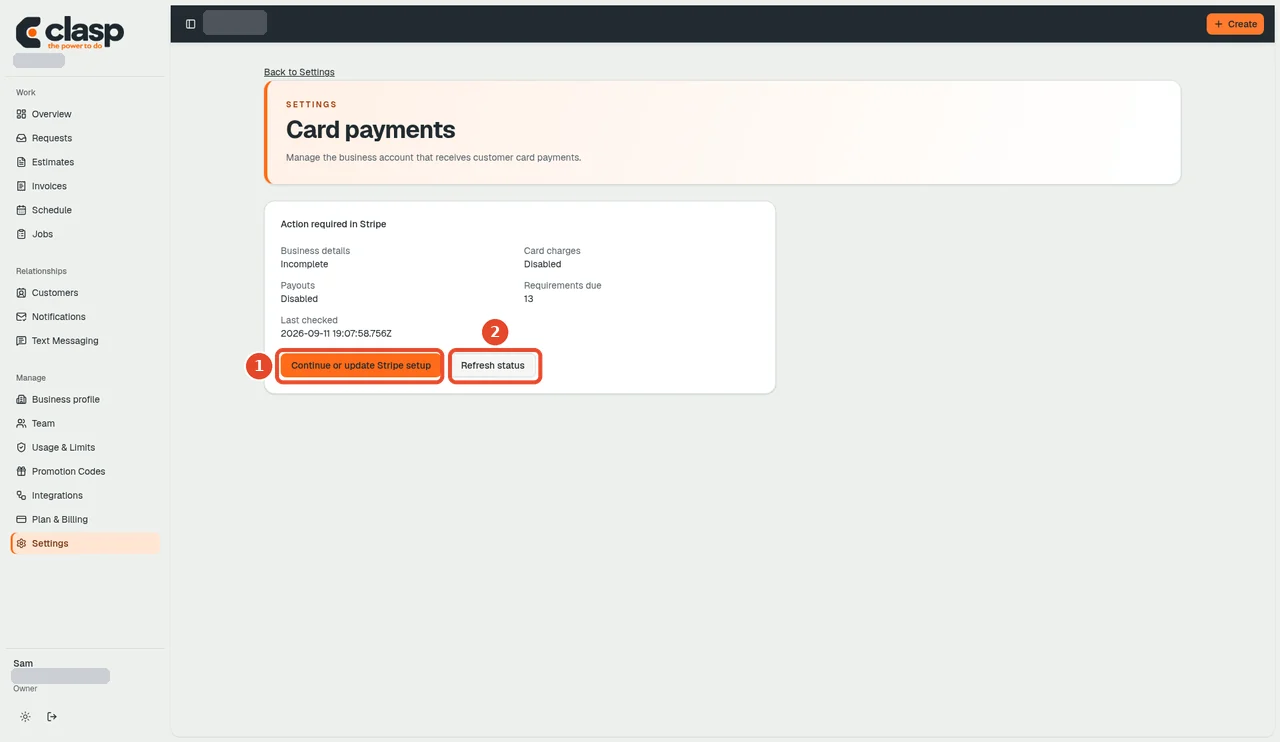
Numbered controls in this screenshot
- 1 — Continue / update Stripe setup: Follow the provider's setup only when available and authorized for your business.
- 2 — Refresh status: Refresh after completing setup. Disabled charges or outstanding requirements mean card collection is not ready.
See customer card payments for the current Stripe and Square readiness boundaries.